
开放街图
HTTP-SSESTDIO提供地理空间数据和位置服务的OSM服务器
提供地理空间数据和位置服务的OSM服务器
An OpenStreetMap MCP server implementation that enhances LLM capabilities with location-based services and geospatial data.
osm-mcp-server: The main server, available for public use.
"mcpServers": {
  "osm-mcp-server": {
    "command": "uvx",
    "args": [
      "osm-mcp-server"
    ]
  }
}
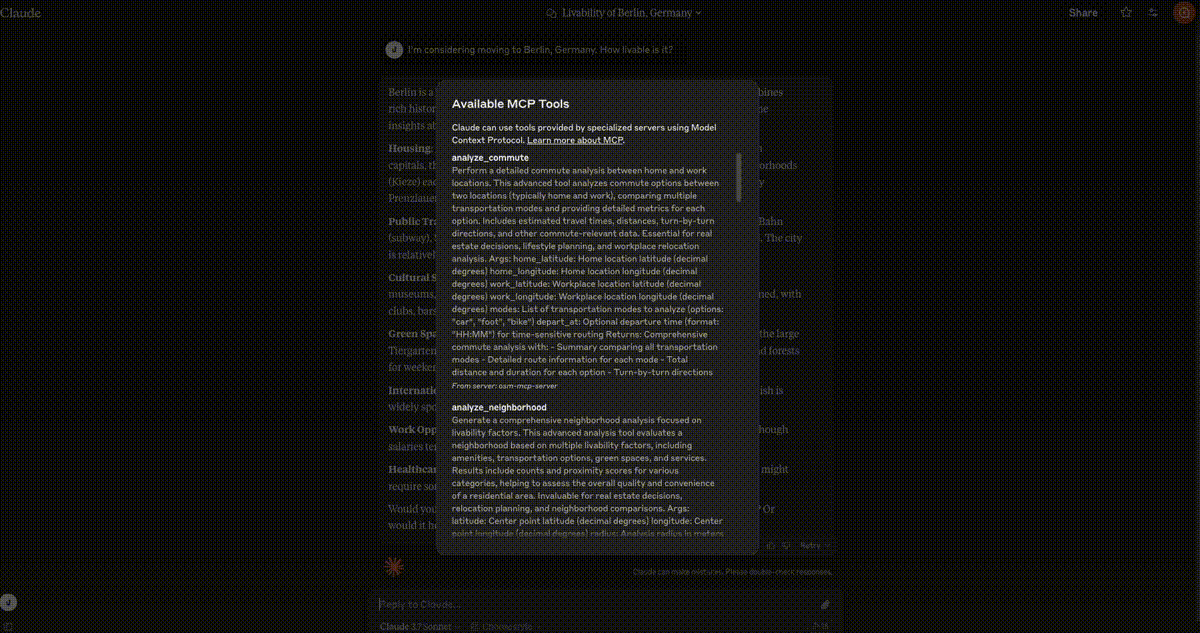
This server provides LLMs with tools to interact with OpenStreetMap data, enabling location-based applications to:
The server implements location-based resources:
location://place/{query}: Get information about places by name or addresslocation://map/{style}/{z}/{x}/{y}: Get styled map tiles at specified coordinatesThe server implements several geospatial tools:
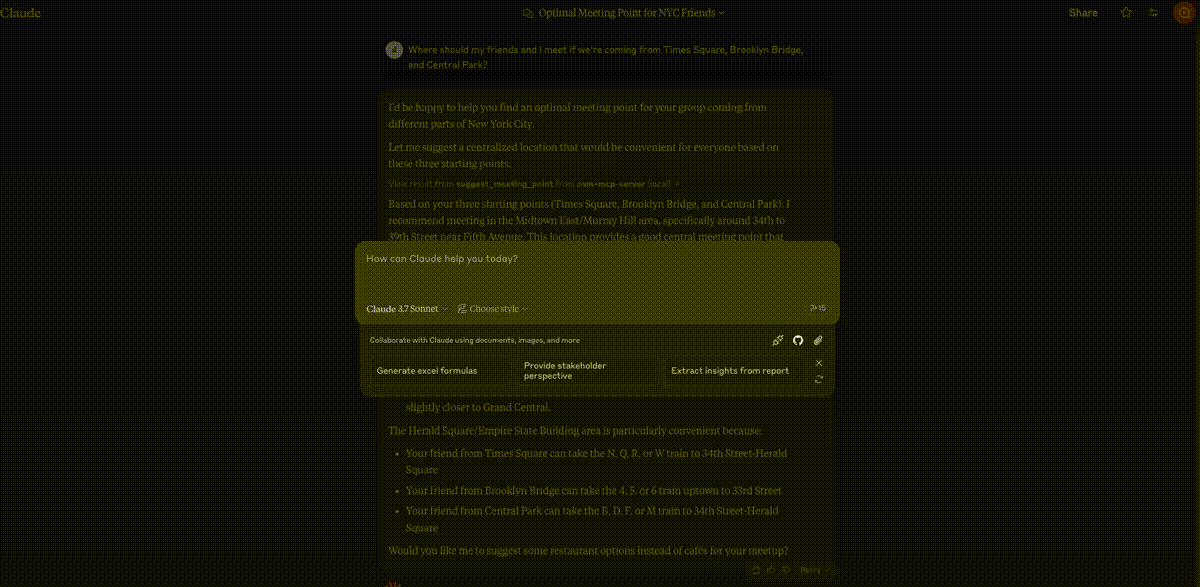
geocode_address: Convert text to geographic coordinatesreverse_geocode: Convert coordinates to human-readable addressesfind_nearby_places: Discover points of interest near a locationget_route_directions: Get turn-by-turn directions between locationssearch_category: Find places of specific categories in an areasuggest_meeting_point: Find optimal meeting spots for multiple peopleexplore_area: Get comprehensive data about a neighborhoodfind_schools_nearby: Locate educational institutions near a specific locationanalyze_commute: Compare transportation options between home and workfind_ev_charging_stations: Locate EV charging infrastructure with filteringanalyze_neighborhood: Evaluate neighborhood livability for real estatefind_parking_facilities: Locate parking options near a destinationTo run the server locally:
pip install -e .
osm-mcp-server
The repository includes two example clients in the examples/ directory:
client.py demonstrates basic usage of the OSM MCP server:
python examples/client.py
This will:
llm_client.py provides a helper class designed for LLM integration:
python examples/llm_client.py
This example shows how an LLM can use the Location Assistant to:
To create your own client:
from mcp.client import Client
client = Client("http://localhost:8000")
# Example: Geocode an address
results = await client.invoke_tool("geocode_address", {"address": "New York City"})
On MacOS: ~/Library/Application\ Support/Claude/claude_desktop_config.json
On Windows: %APPDATA%/Claude/claude_desktop_config.json
"mcpServers": {
  "osm-mcp-server": {
    "command": "uv",
    "args": [
      "--directory",
      "/path/to/osm-mcp-server",
      "run",
      "osm-mcp-server"
    ]
  }
}
To prepare the package for distribution:
uv sync
uv build
This will create source and wheel distributions in the dist/ directory.
uv publish
Note: You'll need to set PyPI credentials via environment variables or command flags.
Since MCP servers run over stdio, debugging can be challenging. For the best debugging experience, we strongly recommend using the MCP Inspector.
You can launch the MCP Inspector via npm with this command:
npx @modelcontextprotocol/inspector uv --directory /path/to/osm-mcp-server run osm-mcp-server
Upon launching, the Inspector will display a URL that you can access in your browser to begin debugging.