
Task Manager
STDIOTask management MCP server with unlimited context window for AI code editors like Cursor.
Task management MCP server with unlimited context window for AI code editors like Cursor.
This is an MCP server built to integrate with AI code editors like Cursor. The main goal here is to maximize Cursor's agentic capabilities and Gemini 2.5's excellent architecting capabilities while working around Cursor's extremely limited context window. This was inspired largely by Roo Code's Boomerang mode, but I found it extremely expensive as the only model that works with it's apply bot is Claude 3.7 Sonnet. With this server, you get the best of both worlds: unlimited context window and unlimited usage for the price of Cursor's $20/month subscription.
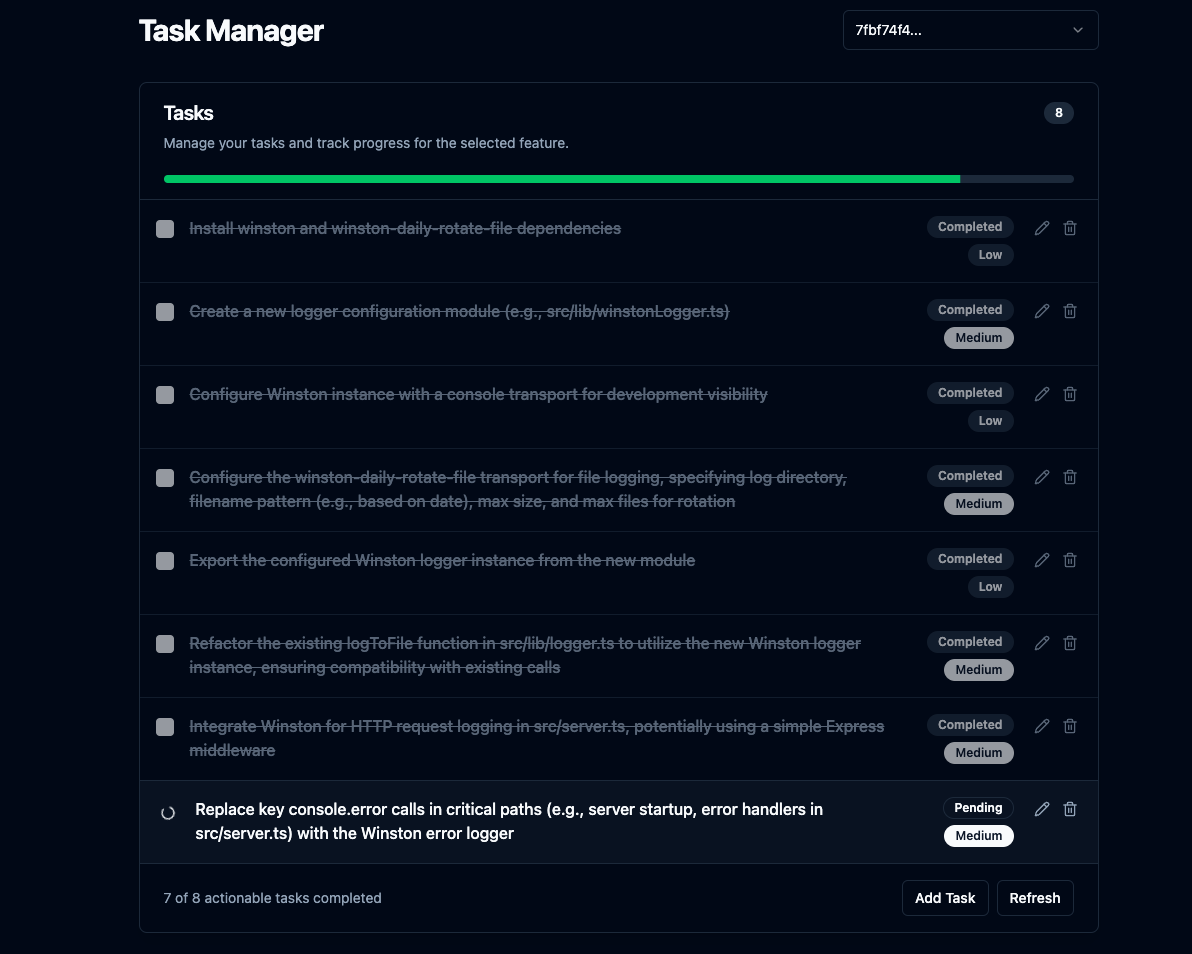
In addition, it includes a Svelte UI that allows you to view the task list and progress, manually adjust the plan, and review the changes.
repomix to generate a step-by-step coding plan for the AI agent to follow with recursive task breakdown for high-effort tasks.repomix's truncation when needed..mcp/features/ for each feature, allowing Gemini 2.5 to have context when the user asks for adjustments to the plan.git diff HEAD output using an LLM and creates new tasks if needed.AUTO_REVIEW_ON_COMPLETION=true), automatically runs the code review process after the last original task for a feature is completed.adjust_plan tool.Clone:
git clone https://github.com/jhawkins11/task-manager-mcp.git
cd task-manager-mcp
Install Backend Deps:
npm install
Configure: You'll configure API keys later directly in Cursor's MCP settings (see Usage section), but you might still want a local .env file for manual testing (see Configuration section).
Build: This command builds the backend and frontend servers and copies the Svelte UI to the dist/frontend-ui/ directory.
npm run build
For local testing without Cursor, you can run the server using Node directly or the npm script. This method will use the .env file for configuration.
Using Node directly (use absolute path):
node /full/path/to/your/task-manager-mcp/dist/server.js
Using npm start:
npm start
This starts the MCP server (stdio), WebSocket server, and the HTTP server for the UI. The UI should be accessible at http://localhost:<UI_PORT> (default 3000).
If running manually (not via Cursor), create a .env file in the project root for API keys and ports. Note: When running via Cursor, these should be set in Cursor's mcp.json configuration instead (see Usage section).
# .env - USED ONLY FOR MANUAL `npm start` or `node dist/server.js`
# === OpenRouter (Recommended) ===

# Get key: https://openrouter.ai/keys
OPENROUTER_API_KEY=sk-or-v1-xxxxxxxxxxxxxxxxxxxxxxxxxxxxxxxxxxxxxxxxxxxxxxxx
OPENROUTER_MODEL=google/gemini-2.5-flash-preview:thinking
FALLBACK_OPENROUTER_MODEL=google/gemini-2.5-flash-preview:thinking

# === Google AI API (Alternative) ===
# GEMINI_API_KEY=your_google_ai_api_key
# GEMINI_MODEL=gemini-1.5-flash-latest
# FALLBACK_GEMINI_MODEL=gemini-1.5-flash-latest

# === UI / WebSocket Ports ===
# Default is 4999 if not set.
UI_PORT=4999
WS_PORT=4999

# === Auto Review ===
# If true, the agent will automatically run the 'review_changes' tool after the last task is completed.
# Defaults to false.
AUTO_REVIEW_ON_COMPLETION=false
IMPORTANT: It's highly recommended to integrate your own Google AI API key to OpenRouter to avoid the free models' rate limits. See below.
Using OpenRouter's Free Tiers: You can significantly minimize or eliminate costs by using models marked as "Free" on OpenRouter (like google/gemini-2.5-flash-preview:thinking at the time of writing) while connecting your own Google AI API key. Check out this reddit thread for more info: https://www.reddit.com/r/ChatGPTCoding/comments/1jrp1tj/a_simple_guide_to_setting_up_gemini_25_pro_free/
Fallback Costs: The server automatically retries with a fallback model if the primary hits a rate limit. The default fallback (FALLBACK_OPENROUTER_MODEL) is often a faster/cheaper model like Gemini Flash, which might still have associated costs depending on OpenRouter's current pricing/tiers. Check their site and adjust the fallback model in your configuration if needed.
This is the primary way this server is intended to be used. I have not yet tested it with other AI code editors yet. If you try it, please let me know how it goes, and I'll update the README.
After building the server (npm run build), you need to tell Cursor how to run it.
Find Cursor's MCP configuration file. This can be:
.cursor/mcp.json inside your project's root directory.~/.cursor/mcp.json in your user home directory (for use across all projects).Add the following entry to the mcpServers object within that JSON file:
{
  "mcpServers": {
    "task-manager-mcp": {
      "command": "node",
      "args": ["/full/path/to/your/task-manager-mcp/dist/server.js"],
      "env": {
        "OPENROUTER_API_KEY": "sk-or-v1-xxxxxxxxxxxxxxxxxxxx"
        //   optional: my recommended model for MCP is Gemini 2.5 Pro Free which is already set by default
        //   "OPENROUTER_MODEL": "google/gemini-2.5-flash-preview:thinking",
        //   also optional
        //   "FALLBACK_OPENROUTER_MODEL": "google/gemini-2.5-flash-preview:thinking",
        //   optional: the default port for the UI is 4999 if not set
        //   "UI_PORT": "4999",
        //   optional: the default port for the WebSocket server is 4999 if not set
        //   "WS_PORT": "4999"
        // Add GEMINI_API_KEY here instead if using Google directly
        // Add any other necessary env vars here
      }
    }
    // Add other MCP servers here if you have them
  }
}
IMPORTANT:
/full/path/to/your/task-manager-mcp/dist/server.js with the absolute path to the compiled server script on your machine.sk-or-v1-xxxxxxxxxxxxxxxxxxxx with your actual OpenRouter API key (or set GEMINI_API_KEY if using Google AI directly)..env file.plan_feature, mark_task_complete, get_next_task, review_changes, adjust_plan) are available and enabled for this mode. You might want to enable other tools like Codebase, Terminal, etc., depending on your workflow.Always use plan_feature mcp tool when getting feature request before doing anything else. ALWAYS!!!!!!!! It will return the first step of the implementation. DO NOT IMPLEMENT MORE THAN WHAT THE TASK STATES. After you're done run mark_task_complete which will give you the next task. If the user says "review" use the review_changes tool. The review_changes tool will generate new tasks for you to follow, just like plan_feature. After a review, follow the same one-at-a-time task completion workflow: complete each review-generated task, mark it complete, and call get_next_task until all are done.
If clarification is required at any step, you will not receive the next task and will have to run get_next_task manually after the user answers the clarification question through the UI.
IMPORTANT: Your job is to complete the tasks one at a time. DO NOT DO ANY OTHER CHANGES, ONLY WHAT THE CURRENT TASK SAYS TO DO.
plan_feature tool.status: "completed" and the description of the first task in the message field. The UI (if running) is launched/updated.status: "awaiting_clarification", the featureId, the uiUrl, and instructions for the agent to wait and call get_next_task later. The UI is launched/updated with the question.get_next_task with the featureId.mark_task_complete (with taskId and featureId).review_changes.The integrated Express server provides these basic endpoints for the frontend:
GET /api/features: Returns a list of existing feature IDs.GET /api/tasks/:featureId: Returns the list of tasks for a specific feature.GET /api/tasks: Returns tasks for the most recently created/modified feature.GET /api/features/:featureId/pending-question: Checks if there's an active clarification question for the feature.POST /api/tasks: Creates a new task for a feature.PUT /api/tasks/:taskId: Updates an existing task.DELETE /api/tasks/:taskId: Deletes a task.dist/frontend-ui/ (e.g., index.html).