
Remote MCP Azure Container Apps
HTTP-SSERun remote Node.js MCP server on Azure Container Apps for AI tools integration
Run remote Node.js MCP server on Azure Container Apps for AI tools integration
:star: To stay updated and get notified about changes, star this repo on GitHub!


This is a quick start guide that provides the basic building blocks to set up a remote Model Context Protocol (MCP) server using Azure Container Apps. The MCP server is built using Node.js and TypeScript, and it can be used to run various tools and services in a serverless environment. This project also implements a multi-layered security architecture combining JWT-based authentication with role-based access control (RBAC) to secure the MCP server endpoints and tools.
[!WARNING] Code presented here is for demo purposes only. Your specific scenarios (including rules inside your enterprise, specific security controls, or other protection mechanisms) may differ from the ones that are outlined in this repository. Always conduct a security audit and threat modeling for any production and customer-facing assets that require authentication and authorization.
The Model Context Protocol (MCP) is an open protocol that allows Large Language Models (LLMs) to interact with external tools and services in a standardized way. MCP enables LLMs to access and utilize various resources, such as databases, APIs, and other services, to enhance their capabilities and provide more accurate and relevant responses.
Below is the architecture diagram for a typical MCP server setup:
flowchart TD
    user(("fa:fa-users User"))
    host["VS Code, Copilot, LlamaIndex, Langchain..."]
    clientHttp[MCP HTTP Client]
    serverHttp([MCP HTTP Server])
    agent["Agents (not included in this demo)"]
    AzureOpenAI([Azure AI Foundry])
    GitHub([GitHub Models])
    OpenAI([OpenAI])

    tools["fa:fa-wrench Tools"]
    db[(sqlite DB)]

    user --> hostGroup
    subgraph hostGroup["MCP Host"]
        host -.- agent
        host aaa@ -.- clientHttp
    end

    agent -.- AzureOpenAI & GitHub & OpenAI

    clientHttp aa@ ---> |"Streamable HTTP (authenticated)"| serverHttp

    subgraph container["ACA or localhost"]
      serverHttp a@ -.- tools
      tools b@ -.- add_todo
      tools c@ -.- list_todos
      tools d@ -.- complete_todo
      tools e@ -.- delete_todo
    end

    add_todo bb@ --> db
    list_todos cc@--> db
    complete_todo dd@ --> db
    delete_todo ee@ --> db

    %% styles

    classDef animate stroke-dasharray: 9,5,stroke-dashoffset: 900,animation: dash 25s linear infinite;
    classDef highlight fill:#9B77E8,color:#fff,stroke:#5EB4D8,stroke-width:2px

    class a animate
    class aa animate
    class aaa animate
    class b animate
    class c animate
    class d animate
    class e animate
    class bb animate
    class cc animate
    class dd animate
    class ee animate

    class container highlight
Azure Container Apps is a fully managed, serverless container platform that simplifies the deployment and operation of containerized applications. ACA also provides serverless GPU support, so that you can bring your own containers and deploy them to GPU-backed environments that automatically scale based on demand.
Key benefits:
If you prefer to run the MCP server locally, you can do so by following these steps.
You need to have the following tools installed on your local machine:
Once you have the prerequisites installed, you can follow these steps to run the MCP server locally:
git clone https://github.com/Azure-Samples/mcp-container-ts
cd mcp-container-ts
npm install
npm run generate-token -- --admin
[!NOTE] You can also generate a token with a different role by using the
--admin,--useror--readonlyflags. The generated token will have different permissions based on the role you choose (seesrc/auth/authorization.tsfor more details).
This will append (or create) a new JWT configuration to .env file at the root of the project. The generated token will be used to authenticate requests to the MCP server.
[!IMPORTANT] In a production environment, you should use a more secure method to manage your secrets and tokens.
npm run dev
You should see the following output in the terminal:
  mcp:db 2025-07-23T16:48:05.381Z PRAGMA journal_mode = WAL +0ms
  mcp:db 2025-07-23T16:48:05.382Z CREATE TABLE IF NOT EXISTS todos (
  mcp:db      id INTEGER PRIMARY KEY AUTOINCREMENT,
  mcp:db      text TEXT NOT NULL,
  mcp:db      completed INTEGER NOT NULL DEFAULT 0
  mcp:db    ) +0ms
  mcp:db 2025-07-23T16:48:05.382Z Database "todos" initialized. +0ms
  mcp:index 2025-07-23T16:48:05.449Z MCP Stateless Streamable HTTP Server +0ms
  mcp:index 2025-07-23T16:48:05.449Z MCP endpoint: http://localhost:3000/mcp +0ms
  mcp:index 2025-07-23T16:48:05.449Z Press Ctrl+C to stop the server +0ms
[!NOTE] When the applications starts, the server will create an in-memory SQLite database. This database is used to store the state of the tools and their interactions with the MCP server.
To deploy the MCP server to Azure Container Apps, you can use the Azure Developer CLI (azd). This will allow you to provision and deploy the project to Azure with minimal effort:
Once you have the prerequisites installed, you can follow these steps to deploy the MCP server to Azure Container Apps:
git clone https://github.com/azure-samples/mcp-container-ts.git
cd mcp-container-ts
azd auth login
For GitHub Codespaces users, if the previous command fails, try:
azd auth login --use-device-code
azd up
https://<env-name>.<container-id>.<region>.azurecontainerapps.io
[!NOTE] If you were simply testing the deployment, you can remove and clean up all deployed resources by running the following command to avoid incurring any costs:
azd down --purge --force
You have a few other options to get started with this template. The quickest way to get started is GitHub Codespaces, since it will setup all the tools for you and you can run the MCP server in the browser.
You can run this template virtually by using GitHub Codespaces. The button will open a web-based VS Code instance in your browser:
Open the template (this may take several minutes):
![]()
Open a terminal window
Continue with the next steps to either run the MCP server locally or deploy it to Azure Container Apps.
[!NOTE] If you run the mcp server inside of GitHub Codespaces, make sure to change the port visibility to Public: Click on "PORTS" tabs → right-click on the opened port (3000 by default) → Port visibility → Public.
A related option is VS Code Dev Containers, which will open the project in your local VS Code using the Dev Containers extension:
Install Docker Desktop and VS Code Dev Containers extension if not already installed.
Start Docker Desktop (install it if not already installed)
Open the project:
Open a terminal window
Continue with the next steps to either run the MCP server locally or deploy it to Azure Container Apps.
This repository contains an example that demonstrates how to use the MCP server with OpenAI models. The example is located in the [examples/](./examples/) directory.
The quickest way to connect to the MCP server is the use the provided .vscode/mcp.json configuration file to set up the MCP server in your VS Code environment. This configuration file contains the necessary settings for the MCP server, including the URL and transport type.
{
  "inputs": [
    {
      "password": true,
      "id": "mcp-server-token",
      "description": "Enter the token for the MCP server",
      "type": "promptString",
    }
  ],
  "servers": {
    "mcp-server": {
      "type": "http",
      "url": "http://localhost:3000/mcp",
      "headers": {
        "Authorization": "Bearer ${input:mcp-server-token}"
      }
    },
    "mcp-server-remote": {
      "type": "http",
      "url": "https://<env-name>.<container-id>.<region>.azurecontainerapps.io/mcp",
      "headers": {
        "Authorization": "Bearer ${input:mcp-server-token}"
      }
    }
  }
}
Once you have this file opened, you can click on the "start" inlined action button that will connect the MCP server and fetch the available tools.
IMPORTANT: Because the server is secured with a JWT token, you will be prompted by VS Code to enter the token. You need to copy the value of the "JWT_TOKEN" from the .env file created by the npm run generate-token command.
[!NOTE] In a real world scenario, you would want to validate the token and use a more secure method of authentication. This is just a demo token for testing purposes. Learn more about to secure your server here.
For local development, the URL will be:
http://localhost:3000/mcp
For Azure Container Apps, the URL will be:
https://<env-name>.<container-id>.<region>.azurecontainerapps.io/mcp
/mcp path at the end.I need to send an email to Dan, please add that to my todo list.
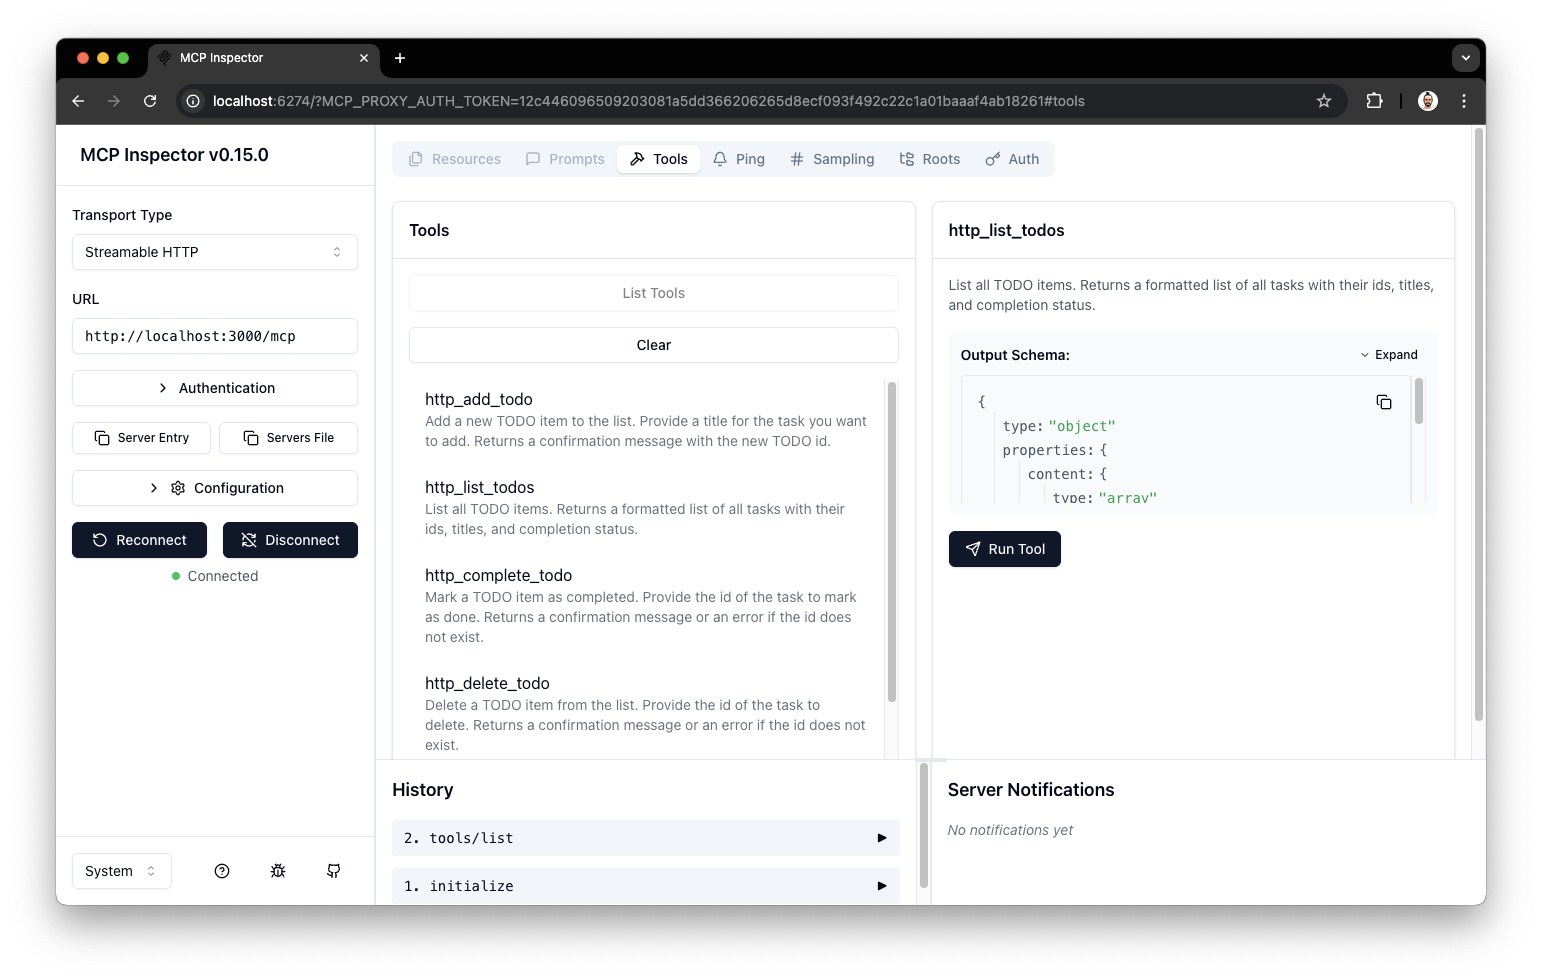
npm run inspect
Streamable HTTP.Authorization and Bearer token which is the value of the "JWT_TOKEN" from the .env file created by the npm run generate-token command.# for local development, use: http://localhost:3000/mcp # or use the Azure Container Apps URL: https://<env-name>.<container-id>.<region>.azurecontainerapps.io/mcp
We encourage you to join our Azure AI Foundry Developer Community to share your experiences, ask questions, and get support:

