
Paytm Payments
STDIOMCP server for secure access to Paytm's Payments and Business Payments APIs
MCP server for secure access to Paytm's Payments and Business Payments APIs
Paytm MCP Server enables AI agents and developers to securely access Paytm's Payments and Business Payments APIs via the Model Context Protocol (MCP). It allows smart, contextual automation across all payment workflows
Smart Payment Ops: Automate routine payment workflows like refunds, settlement tracking, and transaction status checks using AI agents powered by Paytm MCP
Context-Aware AI Assistants: Create intelligent tools that can fetch and explain transactions, initiate payouts, or manage payment links—all through simple natural language prompts
Developer Productivity: Supercharge developer efficiency by enabling Paytm API calls (e.g. "Create a ₹500 payment link") directly via terminals, chat-based UIs, or AI IDE plugins
Agentic AI Payments: Enable agentic AI payments, build enhanced bot led shopping experience through Paytm MCP server
This MCP server can be used in two modes:
| Tool | Description | API |
|---|---|---|
create_link | Create a new payment link | Create Link API |
fetch_link | Fetch details of a payment link | Fetch Link API |
fetch_transaction | Fetch transaction details for a link | Fetch Transaction API |
fetch_order_list | Fetch a list of orders within a date range of 30 days | Order List API |
initiate_refund | Initiate a refund for a specific transaction | Initiate Refund API |
check_refund_status | Check status of a previously initiated refund | Check refund status API |
fetch_refund_list | Fetch a list of refunds within a date range of 30 days | Fetch Refund List API |
get_settlement_summary | Retrieves the overall summary details of a payout corresponding to a single date, a date range, or a payout ID | Get Settlement Summary API |
get_settlement_detail | Retrieves a detailed or transactional view of all settled transactions at the payout level, based on a date range or a payout ID | Get Settlement details API |
get_settlement_order_details | Retrieves settlement details at an order level, based on a specified payout date and order ID | Get Settlement Order Details API |
get_settlement_transaction_details | Retrieves settlement details of an order based on a transaction ID | Get Settlement Transaction Details API |
Use this mode to connect directly to Paytm's hosted MCP instance without setting up your own server.
Step 1: Request Access
To onboard onto Remote MCP, please drop an email to: [email protected]
In your request, include your intent to connect to Remote MCP. In response, you will receive:
You will also need your Merchant ID, which you can retrieve from the Paytm Merchant dashboard.
For Cursor
1. Download the Helper Script
Get the generate_mcp_token_cursor.sh file from this repository.
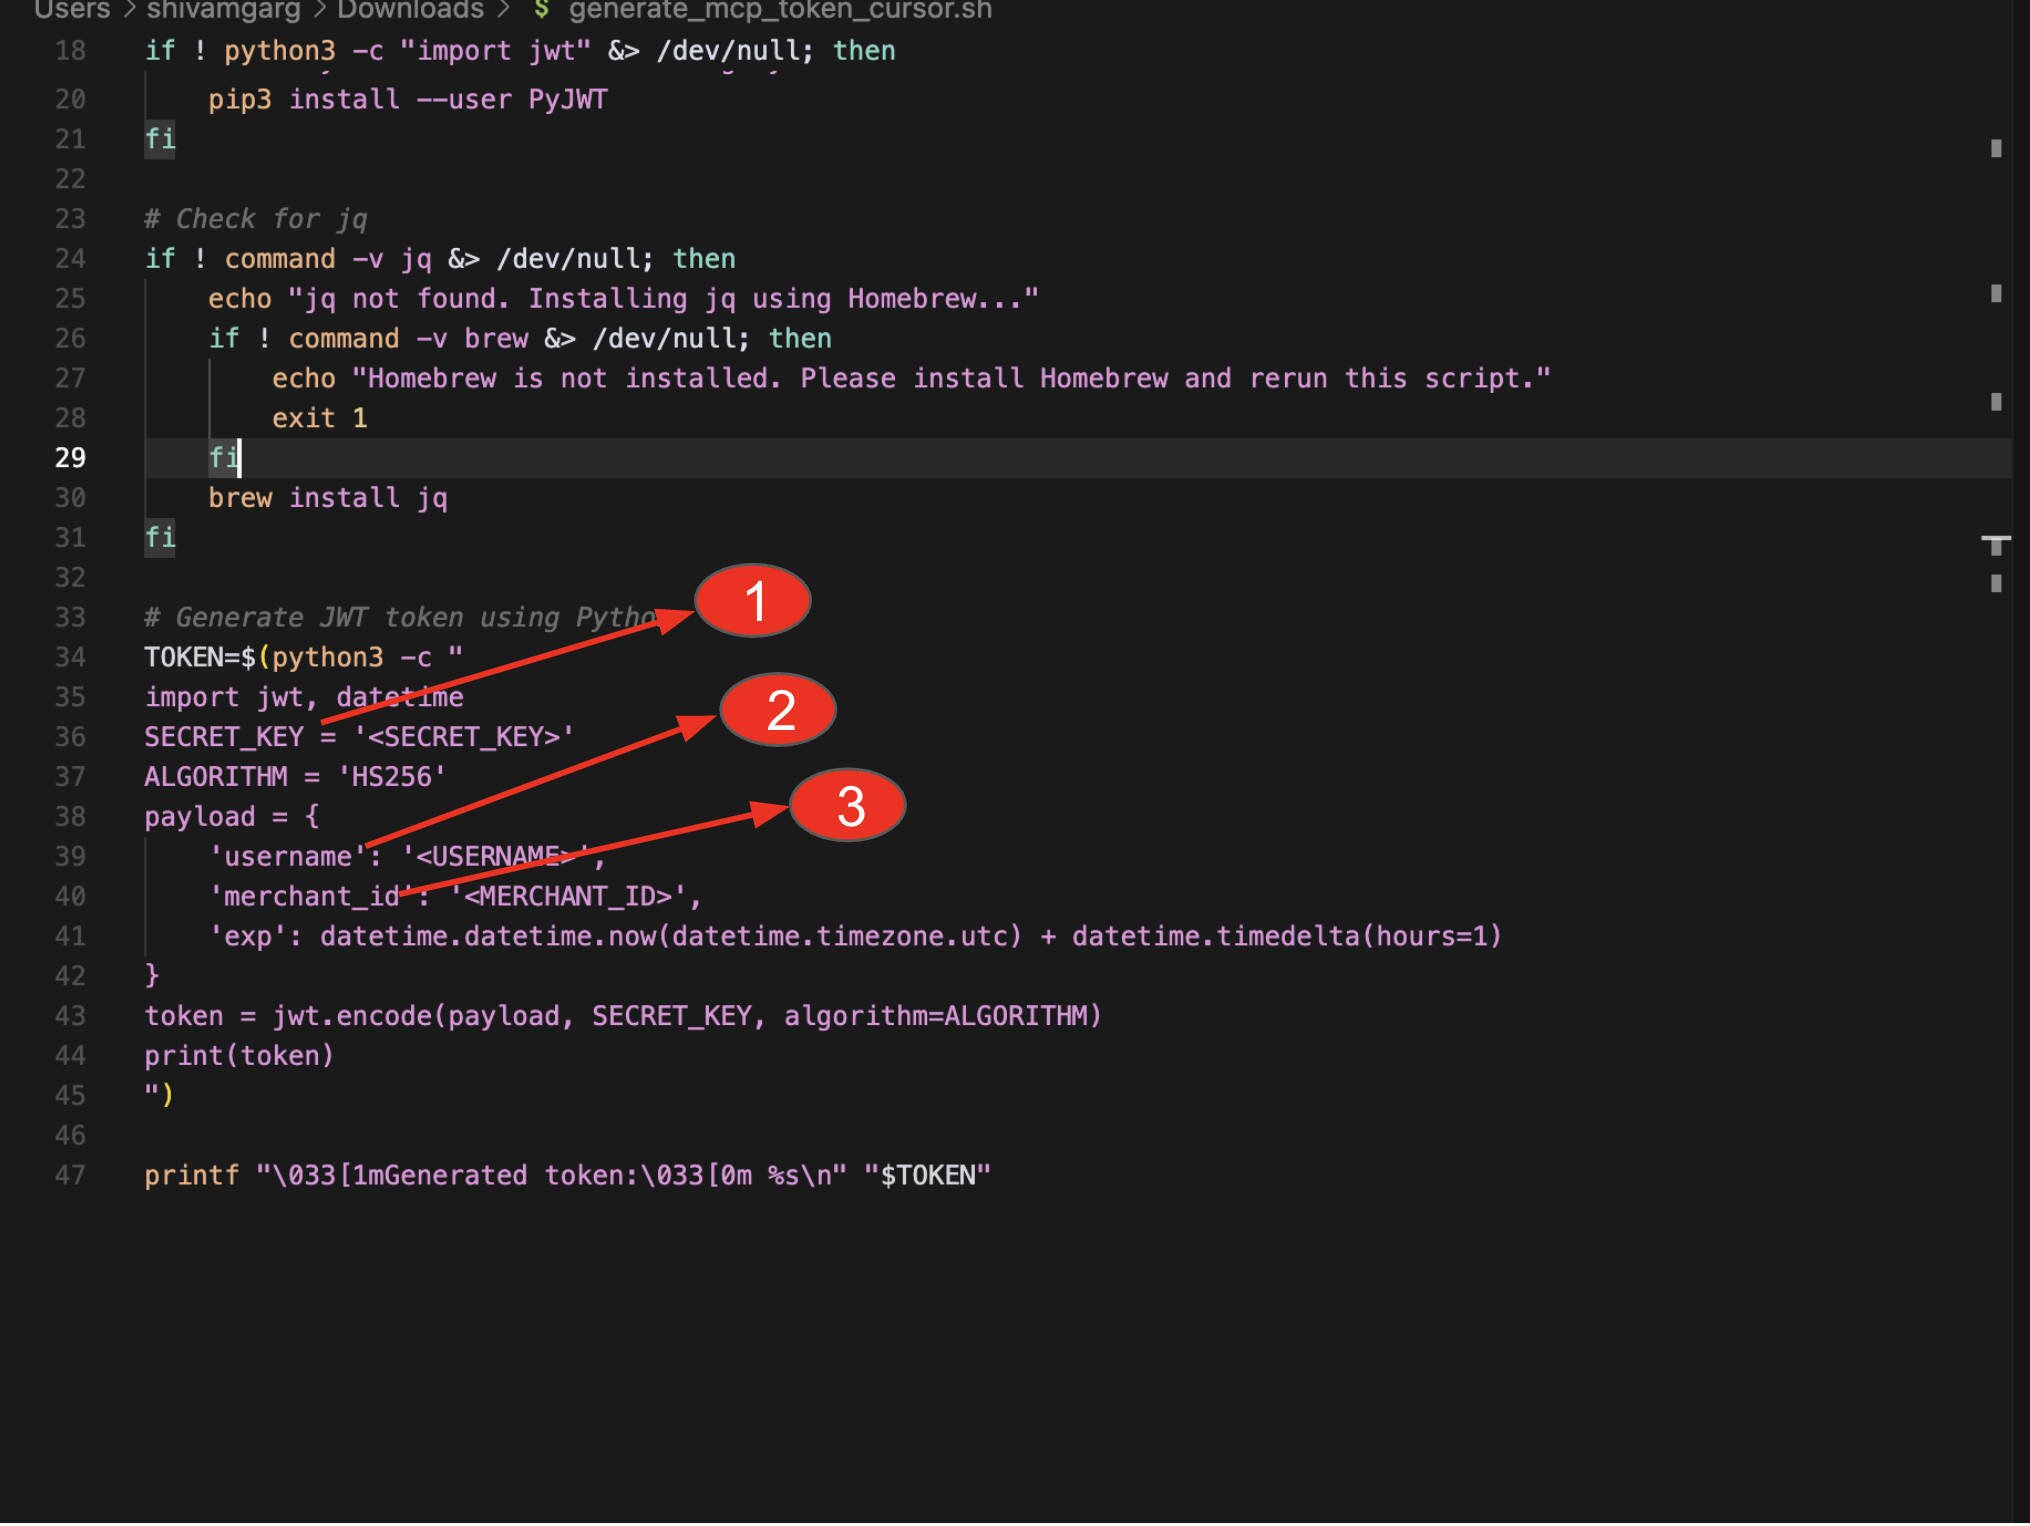
2. Edit the Script
Open the downloaded generate_mcp_token_cursor.sh file in a text editor and modify the below variables as follows:
3. Make the Script Executable
Open terminal/command prompt and navigate to the folder where the file generate_mcp_token_cursor.sh is downloaded. The run the below program.
chmod +x generate_mcp_token_cursor.sh
4. Run the Script
Now run the below command to generate a token.
sh generate_mcp_token_cursor.sh
This will output a valid Authorization Token (JWT).

5. Configure MCP in Cursor
a. Go to cursor, ensure its updated to the latest version which supports Remote MCP ( Click on Cursor → check for updates and update to the latest version)
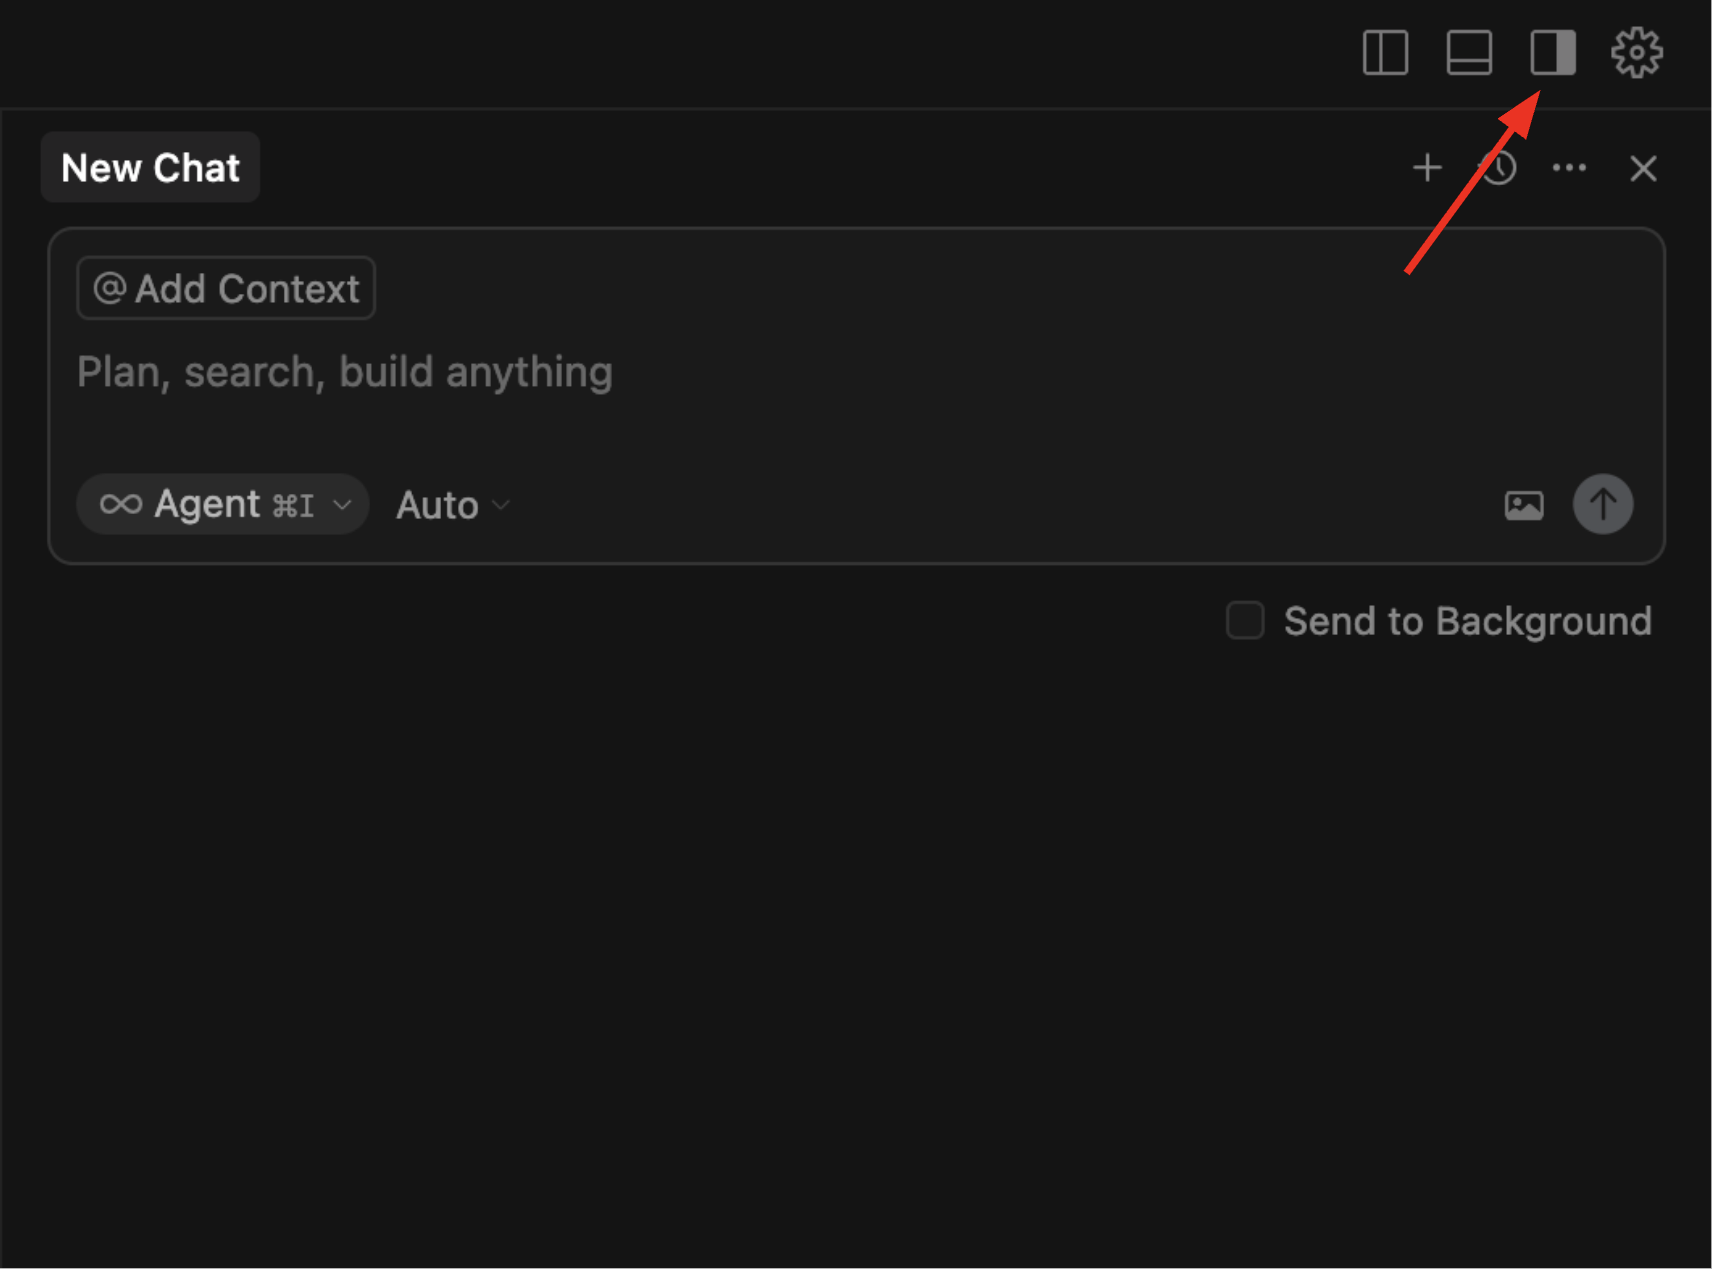
b. Click on settings icon on the top right ( as shown in screenshot below)
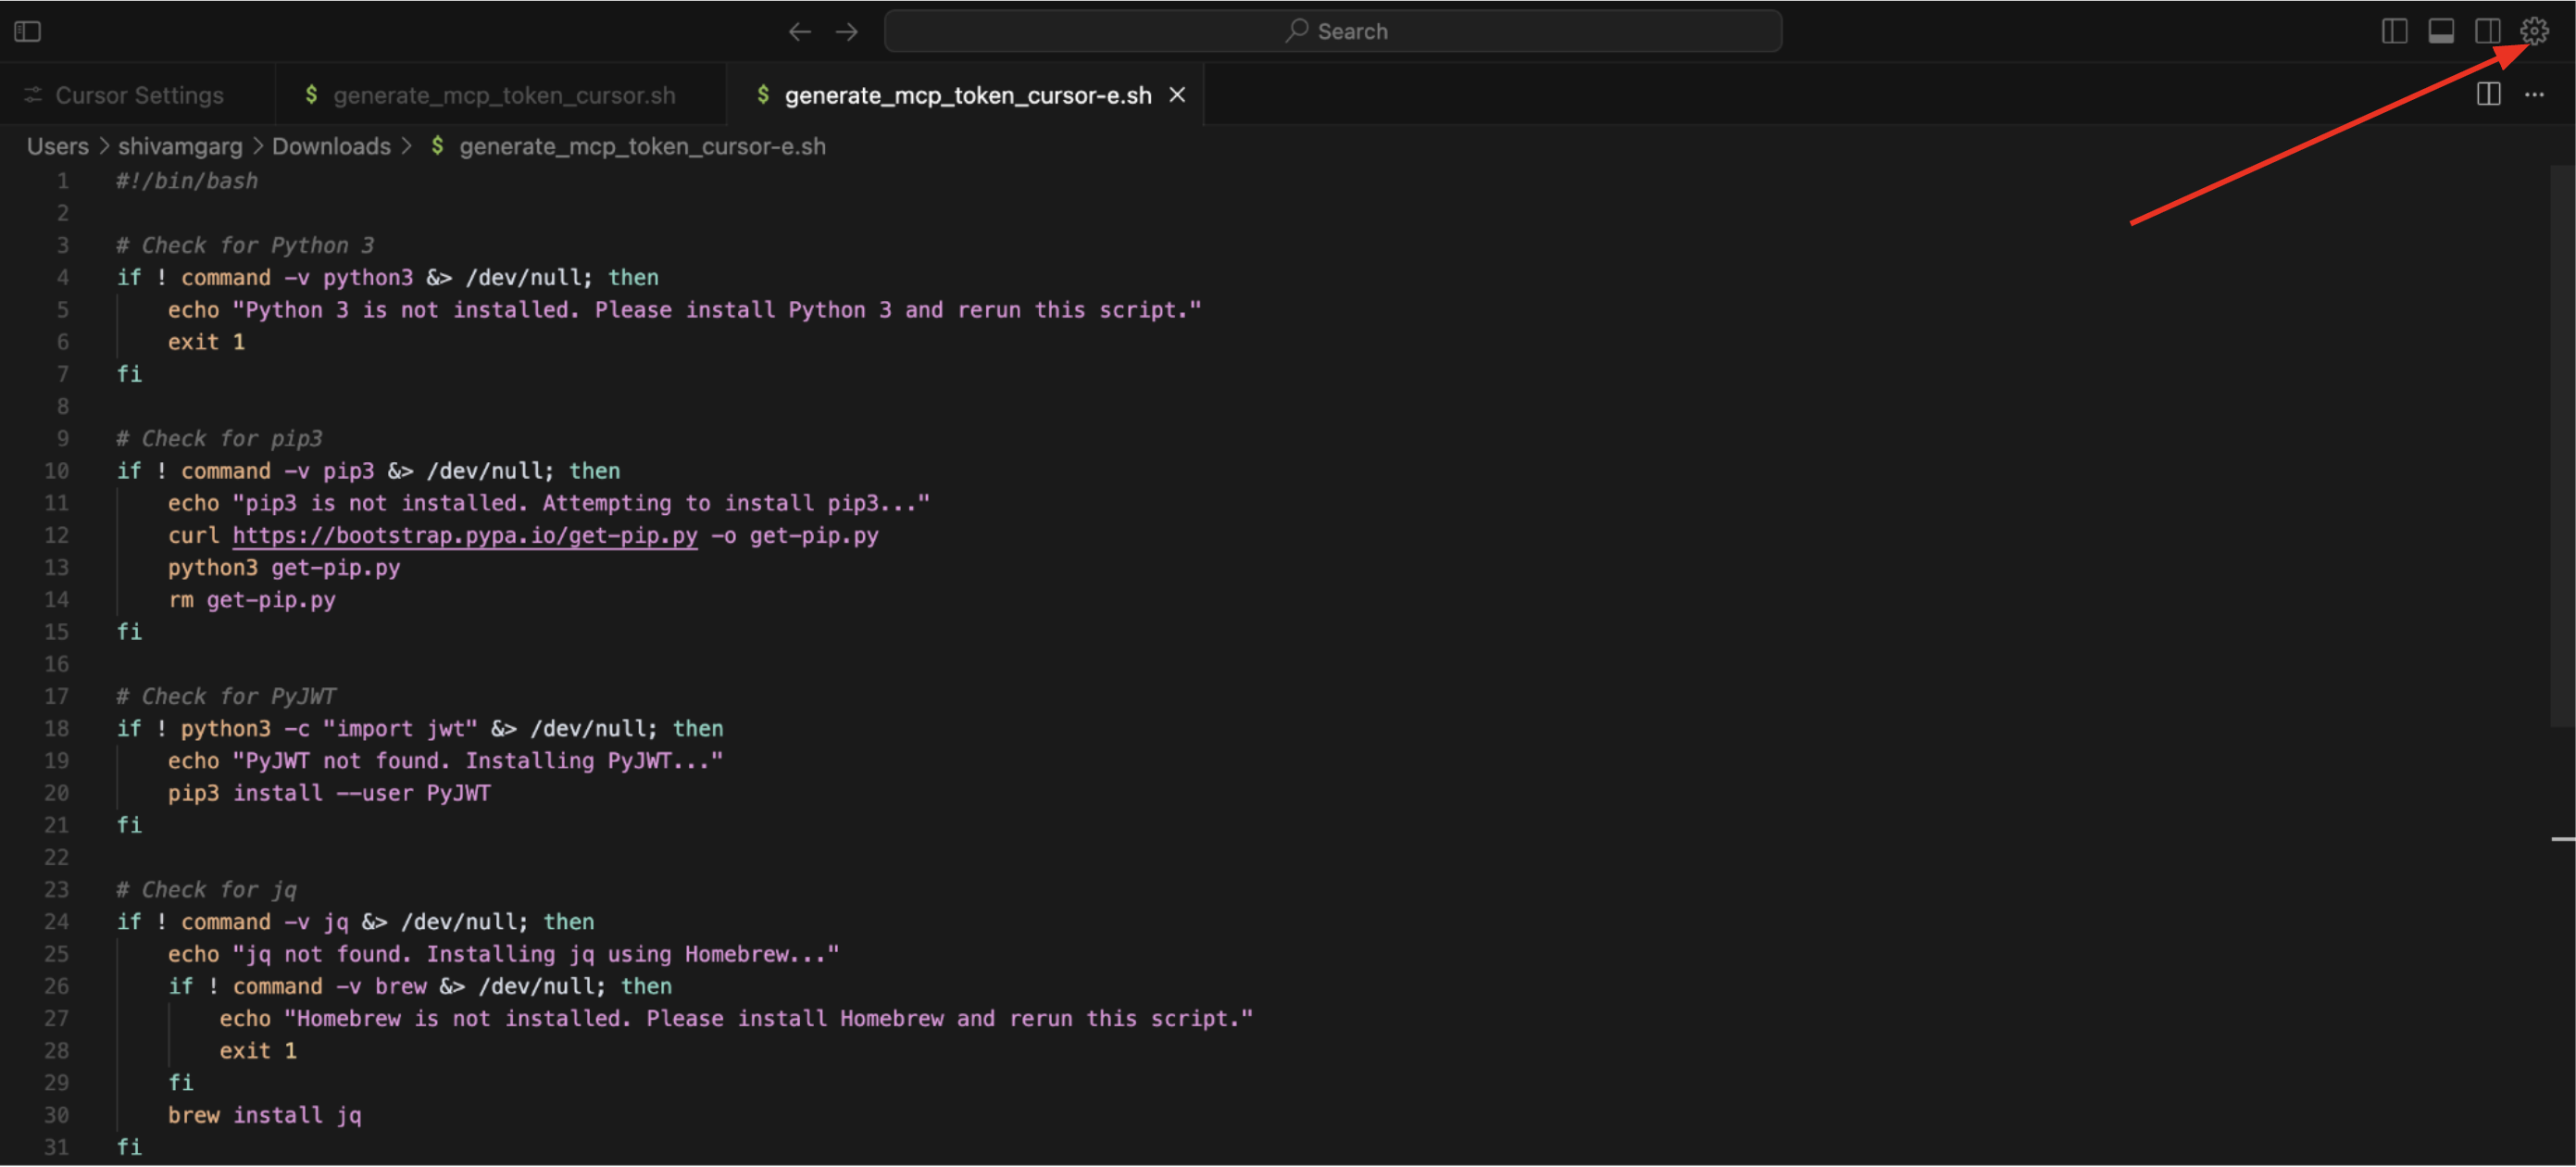
c. Go to Tools and integrations tab once inside the settings.
d. Click on New MCP Server Tab
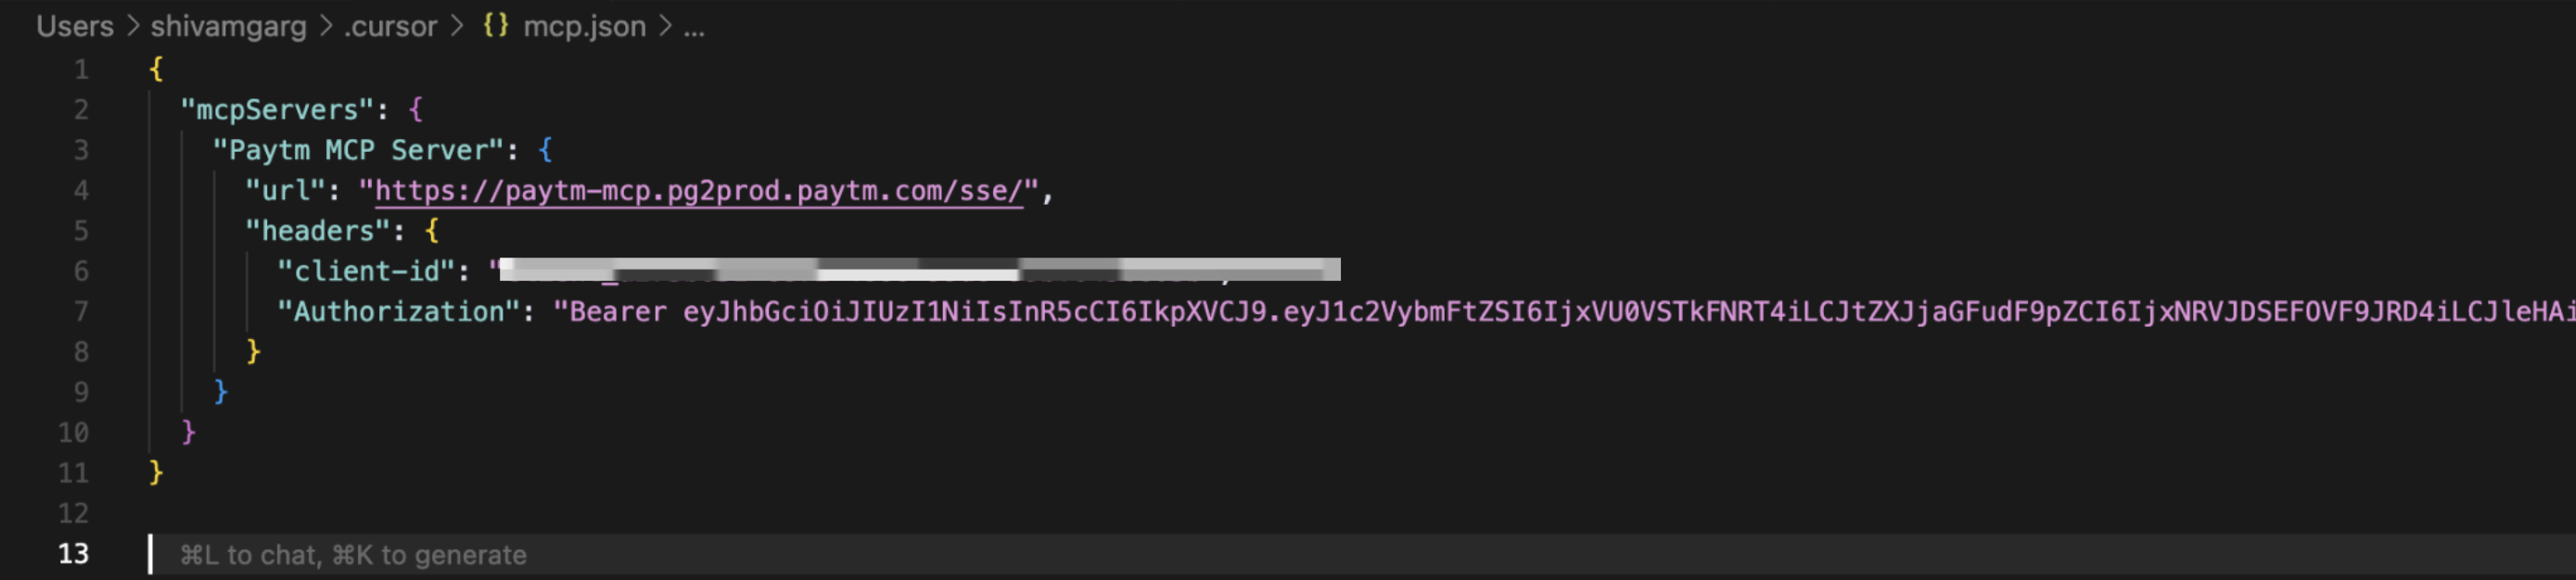
e. Copy paste the below config json inside
Inside your cursor settings in MCP, add this config. Make sure to replace
   {
      "mcpServers": {
         "Paytm MCP Server": {
            "url": "https://paytm-mcp.pg2prod.paytm.com/sse/",
            "headers": {
            "client-id": "<Client ID>",
            "Authorization": "Bearer <Authorization Token>"
            }
         }
      }
   }
Sample Screenshot:
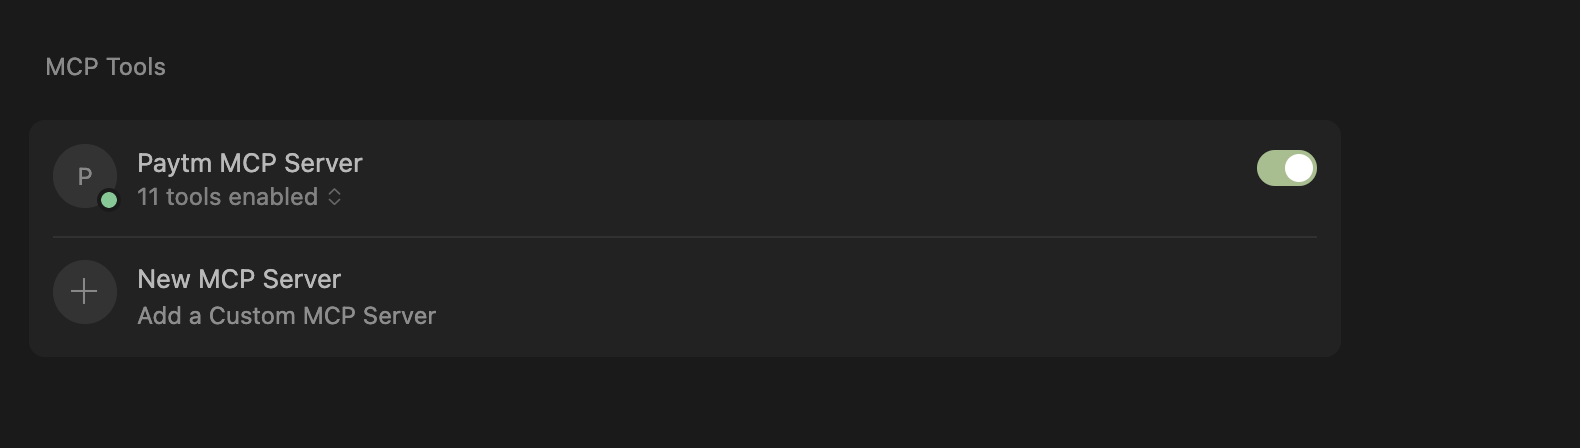
f. Once this is done, go back to Cursor settings (inside the Tools & Integrations tab) . You should see green indicator next to Paytm MCP server - this indicates connection to Paytm MCP Server is successful.
g. Now click on "Toggle AI Panel" on the top right to open a new chat
h. Now you are all set to interact with Paytm MCP Server. You can start asking questions such as "Create Payment Link", "Show me last 10 transactions" etc.
If you'd prefer to run the MCP server locally (for testing or sandbox development), follow the instructions below.
PAYTM_MID and PAYTM_KEY_SECRETDownload the setup.sh script above for automated installation and configuration and follow the below steps:
Run the following in your terminal (Mac/Unix-based):
# Make the script executable
chmod +x setup.sh

# Run the setup script
./setup.sh
The script will:
Note: On Windows, use Git Bash or WSL to run the script, or follow manual installation.
Clone the repository:
git clone https://github.com/paytm/payment-mcp-server.git
cd payment-mcp-server
Create and activate a virtual environment:
uv venv
source .venv/bin/activate
Install dependencies:
uv pip install .
This server is designed to be launched and managed through Claude Desktop. You do not need to run the server manually from the command line.
claude_desktop_config.jsonPlace this file in your project root or as required by Claude Desktop:
{
  "mcpServers": {
    "paytm-mcp-server": {
      "command": "uv path",
      "args": ["--directory", "path to project", "run", "paytm_mcp.py"],
      "env": {
        "PAYTM_MID": "****************",
        "PAYTM_KEY_SECRET": "************"
      }
    }
  }
}
On Mac:
which uv to get the command pathpwd to get the project pathOn Windows:
where uv to get the command pathcd to get the project pathEnsure the paytm_mcp.py file exists in the given path.
The env section should contain your actual Paytm credentials (Paytm MID and Paytm Key Secret)
This project is licensed under the MIT License - see the LICENSE file for details.
The MIT License is a permissive license that allows you to:
The only requirement is that the license and copyright notice must be included in all copies or substantial portions of the software.
Need help? Raise an issue or explore the Paytm Documentation