
OpenAPI MCP
STDIOOpenAPI to MCP proxy transforming API specs into tools for AI agents.
OpenAPI to MCP proxy transforming API specs into tools for AI agents.
![]()


The OpenAPI-MCP proxy translates OpenAPI specs into MCP tools, enabling AI agents to access external APIs without custom wrappers!
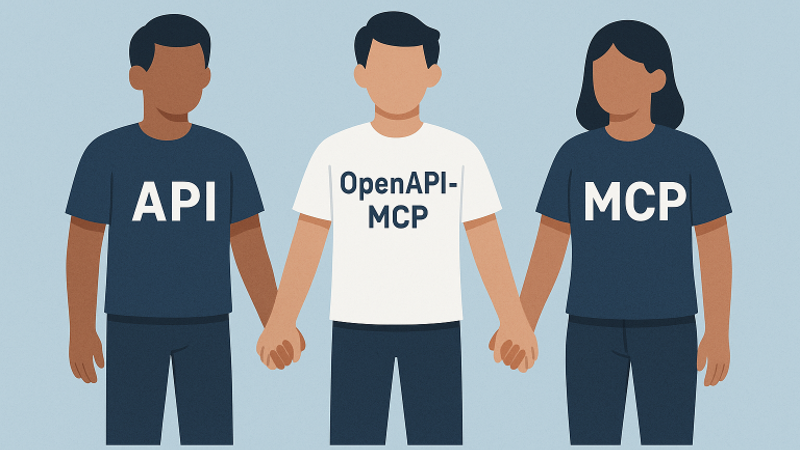
The OpenAPI to Model Context Protocol (MCP) proxy server bridges the gap between AI agents and external APIs by dynamically translating OpenAPI specifications into standardized MCP tools, resources, and prompts. This simplifies integration by eliminating the need for custom API wrappers.
Built with FastMCP following official MCP patterns and best practices, the server provides:
✅ Official FastMCP Integration - Uses the latest FastMCP framework for optimal performance
✅ Proper MCP Transport - Supports stdio, SSE, and streamable HTTP transports
✅ Modular Architecture - Clean separation of concerns with dependency injection
✅ Production Ready - Robust error handling, comprehensive logging, and type safety
Repository: https://github.com/gujord/OpenAPI-MCP
If you find it useful, please give it a ⭐ on GitHub!
stdio, working out-of-the-box with popular LLM orchestrators.git clone https://github.com/gujord/OpenAPI-MCP.git cd OpenAPI-MCP python3.12 -m venv venv source venv/bin/activate # On Windows: venv\Scripts\activate pip install -r requirements.txt
Option 1: Quick Test (Norwegian Weather API)
# Activate virtual environment
source venv/bin/activate

# Run weather API server
OPENAPI_URL="https://api.met.no/weatherapi/locationforecast/2.0/swagger" \
SERVER_NAME="weather" \
python src/fastmcp_server.py
Option 2: HTTP Transport (Recommended for Claude Desktop)
# Start weather API with HTTP transport
source venv/bin/activate && \
OPENAPI_URL="https://api.met.no/weatherapi/locationforecast/2.0/swagger" \
SERVER_NAME="weather" \
MCP_HTTP_ENABLED="true" \
MCP_HTTP_PORT="8001" \
python src/fastmcp_server.py
1. Copy the provided configuration:
cp claude_desktop_config.json ~/Library/Application\ Support/Claude/claude_desktop_config.json
2. Start the weather server:
source venv/bin/activate && \
OPENAPI_URL="https://api.met.no/weatherapi/locationforecast/2.0/swagger" \
SERVER_NAME="weather" \
MCP_HTTP_ENABLED="true" \
MCP_HTTP_PORT="8001" \
python src/fastmcp_server.py
3. Test in Claude Desktop:
weather_get__compact tool automatically!Run multiple OpenAPI services simultaneously:
# Terminal 1: Weather API
source venv/bin/activate && \
OPENAPI_URL="https://api.met.no/weatherapi/locationforecast/2.0/swagger" \
SERVER_NAME="weather" \
MCP_HTTP_ENABLED="true" \
MCP_HTTP_PORT="8001" \
python src/fastmcp_server.py

# Terminal 2: Petstore API
source venv/bin/activate && \
OPENAPI_URL="https://petstore3.swagger.io/api/v3/openapi.json" \
SERVER_NAME="petstore" \
MCP_HTTP_ENABLED="true" \
MCP_HTTP_PORT="8002" \
python src/fastmcp_server.py
Quick start with Docker:
# Start all services (weather + petstore)
./docker-start.sh

# Or manually
docker-compose up --build -d
This automatically runs:
HTTP Transport (Recommended):
Use the provided configuration file:
cp claude_desktop_config.json ~/Library/Application\ Support/Claude/claude_desktop_config.json
Or create manually:
{
  "mcpServers": {
    "weather": {
      "command": "npx",
      "args": ["mcp-remote", "http://127.0.0.1:8001/sse"]
    },
    "petstore": {
      "command": "npx",
      "args": ["mcp-remote", "http://127.0.0.1:8002/sse"]
    }
  }
}
Stdio Transport (Alternative):
{
  "mcpServers": {
    "weather": {
      "command": "/full/path/to/OpenAPI-MCP/venv/bin/python",
      "args": ["/full/path/to/OpenAPI-MCP/src/fastmcp_server.py"],
      "env": {
        "SERVER_NAME": "weather",
        "OPENAPI_URL": "https://api.met.no/weatherapi/locationforecast/2.0/swagger"
      },
      "transport": "stdio"
    }
  }
}
Note: Replace
/full/path/to/OpenAPI-MCPwith your actual installation path.
{
  "mcpServers": {
    "local_api": {
      "command": "/full/path/to/OpenAPI-MCP/venv/bin/python",
      "args": ["/full/path/to/OpenAPI-MCP/src/fastmcp_server.py"],
      "env": {
        "SERVER_NAME": "local_api",
        "OPENAPI_URL": "./specs/my-api.yaml",
        "MCP_AUTH_HEADERS": "{\"X-API-Key\": \"your-key-here\"}"
      },
      "transport": "stdio"
    }
  }
}
{
  "mcpServers": {
    "secure_api": {
      "command": "full_path_to_openapi_mcp/venv/bin/python",
      "args": ["full_path_to_openapi_mcp/src/server.py"],
      "env": {
        "SERVER_NAME": "secure_api",
        "OPENAPI_URL": "https://api.example.com/openapi.json",
        "API_USERNAME": "your_username",
        "API_PASSWORD": "your_password"
      },
      "transport": "stdio"
    }
  }
}
{
  "mcpServers": {
    "oauth_api": {
      "command": "full_path_to_openapi_mcp/venv/bin/python",
      "args": ["full_path_to_openapi_mcp/src/server.py"],
      "env": {
        "SERVER_NAME": "oauth_api",
        "OPENAPI_URL": "https://api.example.com/openapi.json",
        "OAUTH_CLIENT_ID": "your_client_id",
        "OAUTH_CLIENT_SECRET": "your_client_secret",
        "OAUTH_TOKEN_URL": "https://api.example.com/oauth/token"
      },
      "transport": "stdio"
    }
  }
}
Configure multiple OpenAPI services to run simultaneously:
{
  "mcpServers": {
    "weather": {
      "command": "npx",
      "args": [
        "mcp-remote",
        "http://127.0.0.1:8001/sse"
      ]
    },
    "petstore": {
      "command": "npx",
      "args": [
        "mcp-remote",
        "http://127.0.0.1:8002/sse"
      ]
    }
  }
}
This configuration gives Claude access to both weather data AND petstore API tools simultaneously, with clear tool naming like weather_get__compact and petstore_addPet.
For a single API service:
Standard SSE Configuration:
{
  "mcpServers": {
    "openapi_service": {
      "command": "npx",
      "args": [
        "mcp-remote",
        "http://127.0.0.1:8001/sse"
      ]
    }
  }
}
Streamable HTTP Configuration:
{
  "mcpServers": {
    "openapi_service": {
      "command": "npx",
      "args": [
        "mcp-remote",
        "http://127.0.0.1:8001/mcp"
      ]
    }
  }
}
With Debugging (for development):
{
  "mcpServers": {
    "openapi_service": {
      "command": "npx",
      "args": [
        "mcp-remote",
        "http://127.0.0.1:8001/sse",
        "--debug"
      ]
    }
  }
}
With Custom Transport Strategy:
{
  "mcpServers": {
    "openapi_service": {
      "command": "npx",
      "args": [
        "mcp-remote",
        "http://127.0.0.1:8001/mcp",
        "--transport",
        "streamable-http"
      ]
    }
  }
}
{
  "mcpServers": {
    "streaming_api": {
      "command": "full_path_to_openapi_mcp/venv/bin/python",
      "args": ["full_path_to_openapi_mcp/src/server.py"],
      "env": {
        "SERVER_NAME": "streaming_api",
        "OPENAPI_URL": "https://api.example.com/openapi.json",
        "SSE_ENABLED": "true",
        "SSE_HOST": "127.0.0.1",
        "SSE_PORT": "8001"
      },
      "transport": "stdio"
    }
  }
}
Apply this configuration to the following files:
~/.cursor/mcp.json~/.codeium/windsurf/mcp_config.json~/Library/Application Support/Claude/claude_desktop_config.jsonReplace
full_path_to_openapi_mcpwith your actual installation path.
Copy the provided example configuration:
cp claude_desktop_config.json ~/Library/Application\ Support/Claude/claude_desktop_config.json
Start both services:
# Terminal 1
source venv/bin/activate && \
OPENAPI_URL="https://api.met.no/weatherapi/locationforecast/2.0/swagger" \
SERVER_NAME="weather" \
MCP_HTTP_ENABLED="true" \
MCP_HTTP_PORT="8001" \
python src/fastmcp_server.py

# Terminal 2
source venv/bin/activate && \
OPENAPI_URL="https://petstore3.swagger.io/api/v3/openapi.json" \
SERVER_NAME="petstore" \
MCP_HTTP_ENABLED="true" \
MCP_HTTP_PORT="8002" \
python src/fastmcp_server.py
Result: Claude gets access to both weather and petstore APIs with prefixed tool names.
| Variable | Description | Required | Default |
|---|---|---|---|
OPENAPI_URL | URL or local file path to OpenAPI specification | Yes | - |
SERVER_NAME | MCP server name | No | openapi_proxy_server |
| Variable | Description | Required | Default |
|---|---|---|---|
OAUTH_CLIENT_ID | OAuth client ID | No | - |
OAUTH_CLIENT_SECRET | OAuth client secret | No | - |
OAUTH_TOKEN_URL | OAuth token endpoint URL | No | - |
OAUTH_SCOPE | OAuth scope | No | api |
| Variable | Description | Required | Default |
|---|---|---|---|
API_USERNAME | API username for authentication | No | - |
API_PASSWORD | API password for authentication | No | - |
API_LOGIN_ENDPOINT | Login endpoint URL | No | Auto-detected |
| Variable | Description | Required | Default |
|---|---|---|---|
MCP_AUTH_HEADERS | Custom authentication headers (JSON or key=value format) | No | - |
| Variable | Description | Required | Default |
|---|---|---|---|
MCP_HTTP_ENABLED | Enable MCP HTTP transport | No | false |
MCP_HTTP_HOST | MCP HTTP server host | No | 127.0.0.1 |
MCP_HTTP_PORT | MCP HTTP server port | No | 8000 |
MCP_CORS_ORIGINS | CORS origins (comma-separated) | No | * |
MCP_MESSAGE_SIZE_LIMIT | Message size limit | No | 4mb |
MCP_BATCH_TIMEOUT | Batch timeout in seconds | No | 30 |
MCP_SESSION_TIMEOUT | Session timeout in seconds | No | 3600 |
| Variable | Description | Required | Default |
|---|---|---|---|
SSE_ENABLED | Enable SSE streaming support | No | false |
SSE_HOST | SSE server host | No | 127.0.0.1 |
SSE_PORT | SSE server port | No | 8000 |
You can now load OpenAPI specs from your local filesystem instead of requiring remote URLs:
source venv/bin/activate
OPENAPI_URL="./specs/my-api.json" \
SERVER_NAME="local_api" \
python src/fastmcp_server.py
source venv/bin/activate
OPENAPI_URL="../shared/api.yaml" \
SERVER_NAME="local_api" \
python src/fastmcp_server.py
source venv/bin/activate
OPENAPI_URL="/Users/myuser/projects/api-spec.json" \
SERVER_NAME="local_api" \
python src/fastmcp_server.py
.json extension.yaml or .yml extension./path/to/spec.yaml, ../spec.json/full/path/to/spec.yamlSupport for APIs requiring custom headers (API keys, tokens, etc.):
source venv/bin/activate
MCP_AUTH_HEADERS='{"X-API-Key": "your-api-key", "X-Client-ID": "client123"}' \
OPENAPI_URL="https://api.example.com/openapi.json" \
SERVER_NAME="custom_api" \
python src/fastmcp_server.py
source venv/bin/activate
MCP_AUTH_HEADERS='X-API-Key=your-api-key,X-Client-ID=client123' \
OPENAPI_URL="https://api.example.com/openapi.json" \
SERVER_NAME="custom_api" \
python src/fastmcp_server.py
MCP_AUTH_HEADERS='{"X-RapidAPI-Key": "your-key"}'MCP_AUTH_HEADERS='{"Authorization": "Bearer custom-token"}'MCP_AUTH_HEADERS='{"X-API-Key": "key", "X-API-Secret": "secret"}'Combine both features for development:
source venv/bin/activate
OPENAPI_URL="./test/fixtures/api.json" \
MCP_AUTH_HEADERS='{"X-API-Key": "dev-key"}' \
SERVER_NAME="dev_api" \
python src/fastmcp_server.py
Test with real weather data (no authentication required):
# Start weather server
source venv/bin/activate && \
OPENAPI_URL="https://api.met.no/weatherapi/locationforecast/2.0/swagger" \
SERVER_NAME="weather" \
MCP_HTTP_ENABLED="true" \
MCP_HTTP_PORT="8001" \
python src/fastmcp_server.py
Available tools:
weather_get__compact - Weather forecast for coordinatesweather_get__complete - Detailed weather forecastweather_get__status - Server statusExample usage in Claude:
Test with Swagger's demo API:
# Start petstore server
source venv/bin/activate && \
OPENAPI_URL="https://petstore3.swagger.io/api/v3/openapi.json" \
SERVER_NAME="petstore" \
MCP_HTTP_ENABLED="true" \
MCP_HTTP_PORT="8002" \
python src/fastmcp_server.py
Available tools:
petstore_addPet - Add a new pet to the storepetstore_findPetsByStatus - Find pets by statuspetstore_getPetById - Find pet by IDsrc/
├── fastmcp_server.py # FastMCP-based main server (recommended)
├── server.py # Legacy MCP server (fallback)
├── config.py # Configuration management
├── auth.py # OAuth authentication handling
├── openapi_loader.py # OpenAPI spec loading and parsing
├── request_handler.py # Request preparation and validation
├── schema_converter.py # Schema conversion utilities
├── exceptions.py # Custom exception hierarchy
└── __init__.py # Package initialization
✅ FastMCP Integration - Uses latest FastMCP framework
✅ Automatic Tool Registration - Converts OpenAPI operations to MCP tools
✅ Multi-Transport Support - stdio, HTTP, SSE
✅ Parameter Validation - Type conversion and validation
✅ Error Handling - Comprehensive JSON-RPC error responses
✅ Authentication - OAuth2 and username/password support
sequenceDiagram
    participant LLM as LLM (Claude/GPT)
    participant MCP as OpenAPI-MCP Proxy
    participant API as External API

    Note over LLM, API: Communication Process

    LLM->>MCP: 1. Initialize (initialize)
    MCP-->>LLM: Metadata, tools, resources, and prompts

    LLM->>MCP: 2. Request tools (tools_list)
    MCP-->>LLM: Detailed list of tools, resources, and prompts

    LLM->>MCP: 3. Call tool (tools_call)

    alt With OAuth2
        MCP->>API: Request OAuth2 token
        API-->>MCP: Access Token
    end

    MCP->>API: 4. Execute API call with proper formatting
    API-->>MCP: 5. API response (JSON)

    alt Type Conversion
        MCP->>MCP: 6. Convert parameters to correct data types
    end

    MCP-->>LLM: 7. Formatted response from API

    alt Dry Run Mode
        LLM->>MCP: Call with dry_run=true
        MCP-->>LLM: Display request information without executing call
    end
The server automatically generates comprehensive metadata to enhance AI integration:
/resource/{server_name}_{schema_name})
# Docker production deployment
docker-compose up -d

# Or with custom configuration
docker run -d \
  -e OPENAPI_URL="https://your-api.com/openapi.json" \
  -e SERVER_NAME="your_api" \
  -e MCP_HTTP_ENABLED="true" \
  -e MCP_HTTP_PORT="8001" \
  -p 8001:8001 \
  openapi-mcp:latest
GET /health❌ RequestHandler.prepare_request() missing arguments
# Solution: Use fastmcp_server.py instead of server.py
python src/fastmcp_server.py  # ✅ Correct
❌ Claude Desktop doesn't see the tools
# Check configuration location
ls ~/Library/Application\ Support/Claude/claude_desktop_config.json

# Restart Claude Desktop after config changes
❌ Connection refused on port 8001
# Check if server is running
lsof -i :8001

# Check server logs for errors
❌ SSL/TLS errors with OpenAPI URLs
# Update certificates
pip install --upgrade certifi httpx
Test server initialization:
python test_weather_oslo.py
Test with mcp-remote:
npx mcp-remote http://127.0.0.1:8001/sse
Check available tools:
curl http://127.0.0.1:8001/health
Python version mismatch:
# Ensure Python 3.12+
python --version

# Recreate virtual environment if needed
rm -rf venv && python3.12 -m venv venv
Missing dependencies:
# Reinstall requirements
pip install --upgrade -r requirements.txt
git checkout -b feature/amazing-featuregit commit -m 'Add amazing feature'git push origin feature/amazing-feature![]()
If you find it useful, please give it a ⭐ on GitHub!