
Interactive Service
STDIOInteractive MCP service for AI tools to request user input and option selection.
Interactive MCP service for AI tools to request user input and option selection.
This is an MCP service implemented using the FastMCP library, designed for interaction with AI tools like Cursor, Windsurf, etc. When AI tools need user input or option selection while calling large language models, they can invoke this MCP service.
The core purpose of this plugin is to enable high-frequency communication and confirmation between AI tools (like Cursor and Windsurf) and users. It significantly improves the efficiency and effectiveness of AI interactions by:
Reducing Wasted Resources: By allowing users to confirm or redirect AI's approach before it commits to a potentially incorrect solution path, the plugin minimizes wasted API calls and computational resources.
Maximizing Resource Utilization: Every API call to Cursor or Windsurf becomes more productive as the AI can verify its understanding and approach with the user before proceeding.
Preventing Attention Fragmentation: By confirming approaches early, the plugin helps maintain focus on the correct solution path rather than having attention diverted to incorrect approaches.
Enabling Interactive Decision Making: Users can actively participate in the decision-making process, providing immediate feedback and guidance to the AI.
Streamlining Complex Tasks: For multi-step tasks, the plugin ensures alignment between user expectations and AI execution at each critical decision point.
This project supports three different user interface types, each with its own characteristics:
# Test option selection with PyQt interface
.\dist\mcp-interactive.exe test select_option --ui pyqt

# Test information supplement with PyQt interface
.\dist\mcp-interactive.exe test request_additional_info --ui pyqt

# You can also specify a file path for testing the request_additional_info tool
.\dist\mcp-interactive.exe test request_additional_info --ui pyqt D:\Path\To\Your\File.md
This project separates dependencies based on different UI types:
requirements-base.txt: Base dependencies, shared by all UI typesrequirements-pyqt.txt: PyQt5 UI dependenciesrequirements-web.txt: Web UI (Flask) dependenciesYou can choose to use either traditional pip or the faster uv package manager to install dependencies.
Choose the appropriate dependency file based on the UI type you want to use:
cd requirements
# CLI UI (minimal dependencies)
pip install -r requirements-base.txt

# PyQt5 UI
pip install -r requirements-pyqt.txt

# Web UI
pip install -r requirements-web.txt
Note: Each specific UI dependency file already includes a reference to the base dependencies (via -r requirements-base.txt), so you only need to install a single file.
If you already have uv installed, you can use the following commands to create a virtual environment and install dependencies:
# Create a virtual environment
uv venv

# Activate the virtual environment
# Windows
.venv\Scripts\activate

# macOS / Linux
source .venv/bin/activate

# Install dependencies based on UI type
cd requirements

# CLI UI (minimal dependencies)
uv pip install -r requirements-base.txt

# PyQt5 UI
uv pip install -r requirements-pyqt.txt

# Web UI
uv pip install -r requirements-web.txt
You can also use the project's pyproject.toml file to install all dependencies directly:
# Install base dependencies
uv pip install -e .

# Install specific UI type dependencies
uv pip install -e ".[pyqt]"     # PyQt5 UI
uv pip install -e ".[web]"      # Web UI
uv pip install -e ".[all]"      # All UI types
Start different UI response methods:
# Command line interface (default)
python main.py run --ui=cli

# Web interface
python main.py run --ui=web

# PyQt interface
python main.py run --ui=pyqt
Other service startup options:
# Start the service with default settings (address: 127.0.0.1, port: 7888)
python main.py run

# Specify host and port
python main.py run --host 0.0.0.0 --port 8888

# Specify log level
python main.py run --log-level warning
The stdio protocol is the most stable and recommended connection method, communicating directly with Python scripts through standard input/output, with the following advantages:
Configuration examples:
{
  "ai-interaction": {
    "command": "python",
    "args": ["path/to/main.py", "run", "--transport", "stdio", "--ui", "cli"],
    "env": {}
  }
}
{
  "ai-interaction": {
    "command": "D:/Path/To/Your/mcp-interactive.exe",
    "args": ["run", "--transport", "stdio", "--ui", "pyqt"],
    "env": {}
  }
}
If you need to connect to a remote server over the network, you can use the SSE protocol:
Local startup:
python main.py run --transport sse
Cursor configuration:
{
  "ai-interaction": {
    "type": "sse",
    "url": "http://127.0.0.1:8000/sse",
    "env": {}
  }
}
Windsurf configuration:
{
  "ai-interaction": {
    "serverUrl": "http://127.0.0.1:7888/sse",
    "disabled": false
  }
}
To maximize the effectiveness of AI interactions in Cursor and Windsurf, configure the following rules for AI to follow when using MCP:
When the AI is unclear about a task or needs additional information, it should call MCP ai-interaction to request clarification from the user.
When the AI has multiple possible approaches to a solution, it should call MCP ai-interaction to let the user select the preferred approach.
After completing a task, the AI should call MCP ai-interaction to confirm whether there are other tasks that need to be executed.
The AI should break down tasks into multiple stages and before starting a new stage, call MCP ai-interaction to ask the user if any additional thoughts or considerations need to be incorporated.
The AI should proactively use MCP to confirm critical decisions rather than making assumptions.
These rules ensure high-quality, interactive AI assistance while maximizing the value of each API call.
python main.py list-tools
# Test option selection tool
python main.py test select_option --ui=cli

# Test information supplement tool
python main.py test request_additional_info --ui=cli
The project includes an interactive test client that allows you to test the MCP service with different UI types and methods:
# Run the interactive test client
python mcp_client_en.py --host localhost --port 7888 --ui cli
Options:
--host: Server host (default: localhost)--port: Server port (default: 7888)--ui: UI type to use (cli, pyqt, web)The client provides:
This is particularly useful for:
For specifically testing the stdio transport protocol, we provide a command line tool:
# Test stdio connection with default settings
python mcp_client_stdio.py

# Specify UI type
python mcp_client_stdio.py --ui=pyqt

# Test specific tools
python mcp_client_stdio.py --test=select_option
For more details, see the STDIO Testing Guide.
# Test PyQt interface
python test_ui.py --ui=pyqt

# Test Web interface
python test_ui.py --ui=web

# Test CLI interface
python test_ui.py --ui=cli
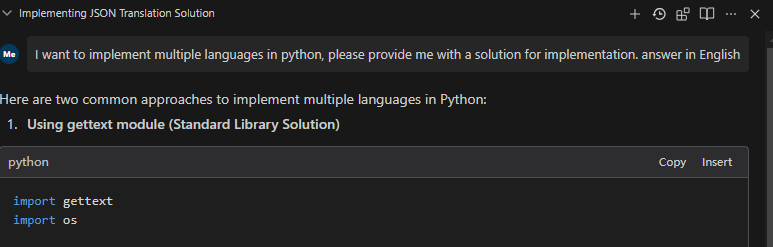
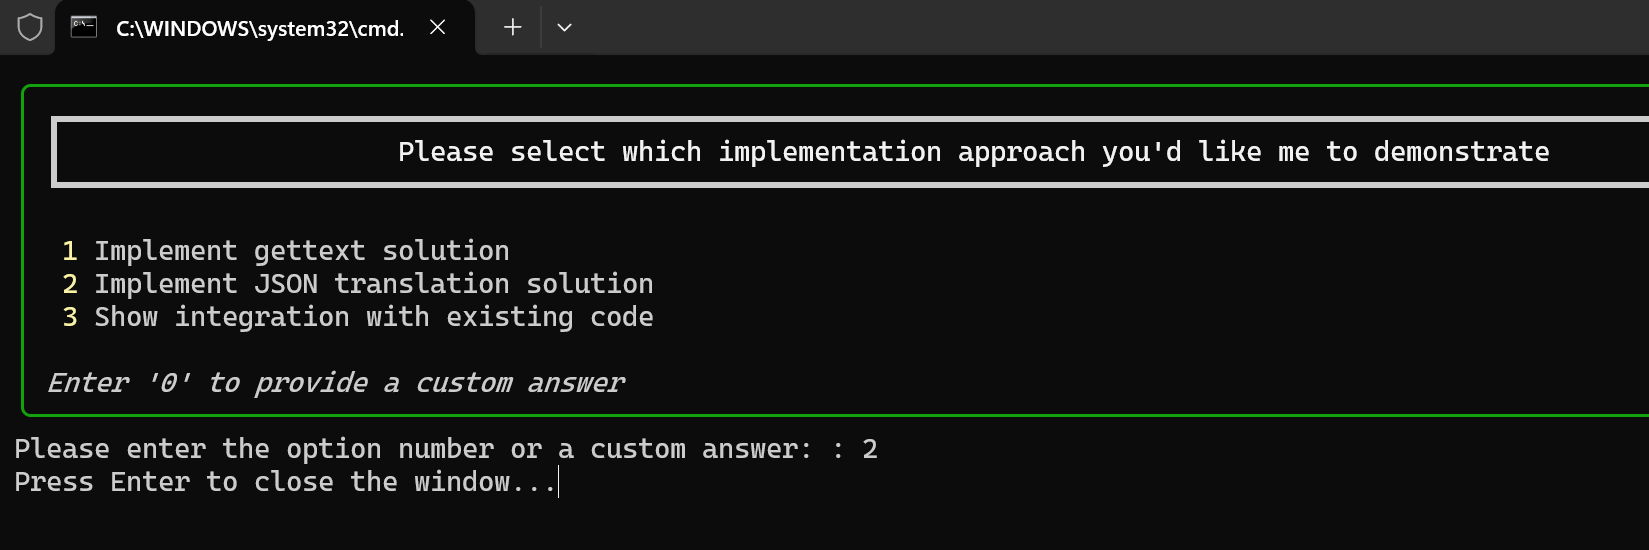
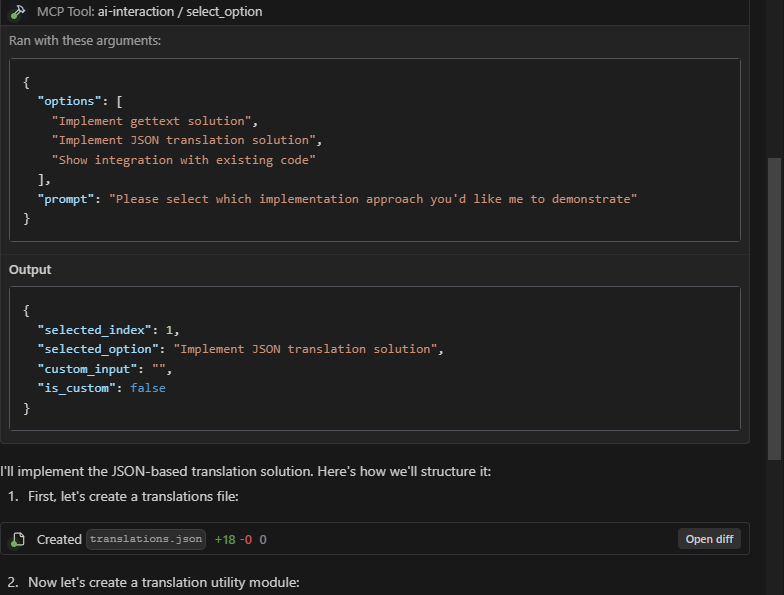
This tool is used to present a set of options to users and let them select by entering numbers or providing custom answers.
Parameters:
options: List of options, can be a list of strings or dictionariesprompt: Prompt message displayed to the userReturn: A dictionary containing the selection result, in the format:
{
    "selected_index": 0,     // Index of the user's selection, -1 if custom answer
    "selected_option": {},   // Content of the user's selected option
    "custom_input": "",      // User's custom input, if any
    "is_custom": false       // Whether it's a custom answer
}
This tool is used to request supplementary information from users.
Parameters:
prompt: Prompt for requesting informationReturn: The supplementary information input by the user (string)
The config.json file in the project root directory can configure various options:
{
  "reminder": {
    "enable_reminder": true,
    "reminder_text": "**Note**:\nUnless I explicitly state there are no new tasks, you must never terminate the conversation. After completing each task, call mcp ai-interaction to request or confirm tasks with me!"
  },
  "ui": {
    "default_ui_type": "pyqt"
  },
  "logging": {
    "level": "warning"
  }
}
Configuration options:
reminder.enable_reminder: Whether to automatically add reminder content to tool return results (default: true)reminder.reminder_text: The reminder text content to addui.default_ui_type: Default UI typelogging.level: Logging levelTo integrate this MCP service with AI tools, follow these steps:
mcp-interactive.exe runpython main.py runTo integrate with Claude in Anthropic's official products or third-party apps:
Configure the stdio connection in your AI tool settings:
{
  "mcp-interaction": {
    "command": "D:/Path/To/Your/mcp-interactive.exe",
    "args": ["run", "--transport", "stdio", "--ui", "pyqt"],
    "env": {}
  }
}
Configure Claude to use the interaction service when needed, with instructions like:
Claude will now be able to present options and request additional information directly through the MCP service.
from fastmcp import Client

async with Client("http://127.0.0.1:8000/sse") as client:
    options = [
        "Option 1: Implement with TensorFlow",
        "Option 2: Implement with PyTorch",
        {"title": "Option 3: Implement with JAX", "description": "Better for research purposes"}
    ]
    result = await client.call_tool(
        "select_option",
        {"options": options, "prompt": "Please select a framework implementation"}
    )
    selected_option = result.json
    print(f"User selected: {selected_option}")
from fastmcp import Client

async with Client("http://127.0.0.1:8000/sse") as client:
    additional_info = await client.call_tool(
        "request_additional_info",
        {
            "prompt": "Please provide specific project requirements"
        }
    )
    print(f"User provided information: {additional_info.text}")
Please note the following status of the implementation:
We are actively working on improving compatibility across all platforms and UI types.
This project includes a script to build a standalone executable file for Windows:
# Build the Windows executable
build_executable.bat
This will create mcp-interactive.exe in the dist directory that you can run without Python installation.
To build executables for different platforms:
# Using the batch script
build_executable.bat

# Or manual PyInstaller command
pyinstaller mcp-interactive.spec
# Ensure PyInstaller is installed
pip install pyinstaller

# Build using the spec file
pyinstaller mcp-interactive.spec
# Ensure PyInstaller is installed
pip install pyinstaller

# Build using the spec file
pyinstaller mcp-interactive.spec
Note: You must build on the target platform (you cannot build macOS executables from Windows, etc.)
To make your built executables available for download:
Example steps:
Users can then download the appropriate version for their operating system from the GitHub releases page.
This project is released under the MIT License.