
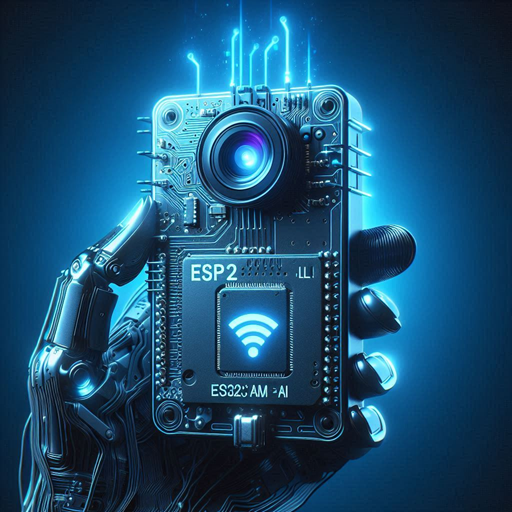
ESP32 CAM AI
HTTP-SSEESP32-CAM MCP server for remote camera control, LED management, and system monitoring
ESP32-CAM MCP server for remote camera control, LED management, and system monitoring
Transform your ESP32-CAM into a powerful, remotely controllable AI-enabled camera system!
![]()
This project transforms an ESP32-CAM into a remotely controllable MCP server that can capture images, control LEDs, manage flash lighting, and provide system diagnostics. The server exposes these capabilities through the Model Context Protocol, making it easy to integrate with AI assistants and automation systems.
Brief: Use Copilot or other AI digital assistants, like AI-Toolkit (in VSCode), Home Assistant (HA) or Node-Red, to use your ESP32-CAM, getting information (camera, wifi- or system state) or set GPIO's (led, flash)
notifications/initializedImportant: For optimal image capture, position the ESP32-CAM with the flash LED facing downward. This orientation:
The camera lens should face the subject while the small flash LED (usually next to the lens) points downward toward the surface or subject being photographed.
ArduinoJson - JSON parsing and generationESP32 Camera - Camera functionality (present in ESP32 SDK)Base64 - Image encoding (present in Arduino core)git clone https://github.com/yourusername/esp32-cam-ai.git cd esp32-cam-ai
Create a .env file in the project root directory with your WiFi credentials:
WIFI_SSID=YourWiFiNetwork
WIFI_PASSWORD=YourPassword
Important: The .env file is required for the project to build successfully. The build system automatically reads these credentials and passes them to the firmware during compilation.
There is a template file .env.template present that can be copied to .env and updated with your credentials.
Note: For security reasons, the .env file should not be committed to version control. Make sure it's included in your .gitignore file.
pio run --target upload
pio device monitor
Look for the IP address in the serial output:
Local IP address: 192.168.1.132

or

mDNS hostname: esp32-7c9ebdf16a10.local
Other ways to find the IP address are
The project includes multiple camera configurations in include/camera_config.h:
// Current configuration for AI-Thinker ESP32-CAM
constexpr camera_config_t esp32cam_aithinker_settings = {
    .pin_pwdn = 32,
    .pin_reset = -1,
    .pin_xclk = 0,
    // ... pin configuration
    .frame_size = FRAMESIZE_QVGA,  // 320x240 pixels (optimized for 4KB limit)
    .jpeg_quality = 12,            // Higher = better quality
    .fb_count = 2
};
Currently only the AI thinker is enabled. This can in the future be extended to other cameras.
Configure LED and Flash pins in your build flags:
build_flags =
    -DLED_GPIO=33         # Built-in LED pin
    -DLED_ON_LEVEL=LOW    # GPIO level for On
    -DFLASH_GPIO=4        # Flash LED pin
    -DFLASH_ON_LEVEL=HIGH # GPIO level for On
Controls the ESP32-CAM's built-in LED state.
Parameters:
state (required): "on" or "off"Example:
{
  "jsonrpc": "2.0",
  "method": "tools/call",
  "params": {
    "name": "led",
    "arguments": {"state": "on"}
  }
}
Triggers the camera flash for a specified duration.
Parameters:
duration (optional): Duration in milliseconds (5-100ms, default: 50ms)Example:
{
  "jsonrpc": "2.0",
  "method": "tools/call",
  "params": {
    "name": "flash",
    "arguments": {"duration": 75}
  }
}
Captures a photo from the ESP32-CAM sensor.
Parameters:
flash (optional): "on" or "off" - Use flash during captureResponse:
Example:
{
  "jsonrpc": "2.0",
  "method": "tools/call",
  "params": {
    "name": "capture",
    "arguments": {"flash": "on"}
  }
}
Returns current network connection information.
No parameters required.
Response includes:
Provides comprehensive system diagnostics and health monitoring.
No parameters required.
Response includes:
Hardware Information:
Memory Statistics:
System Information:
Device Status:
Temperature Monitoring Guidelines:
Memory Health Indicators:
# Capture image with flash
$body = '{"jsonrpc": "2.0", "id": 1, "method": "tools/call", "params": {"name": "capture", "arguments": {"flash": "on"}}}'
Invoke-RestMethod -Uri "http://192.168.1.132/" -Method Post -Body $body -ContentType "application/json"
The MCP server can be integrated with AI assistants that support the Model Context Protocol:
mcp.json):{ "servers": { "esp32-cam-ai": { "type": "http", "url": "http://192.168.1.132" } } }
Use Natural Language Commands:
┌───────────────────┐    ┌───────────────────┐    ┌───────────────────┐
│    MCP Protocol   │────│   Tool Handlers   │────│   Hardware Layer  │
│                   │    │                   │    │                   │
│ • Initialization  │    │ • LED Control     │    │ • Camera (OV2640) │
│ • Tools List      │    │ • Flash Control   │    │ • GPIO Control    │
│ • Tools Call      │    │ • Capture         │    │ • WiFi Module     │
│ • Notifications   │    │ • Status Check    │    │ • Flash Storage   │
└───────────────────┘    └───────────────────┘    └───────────────────┘
  │                          │                      │
  └──────────────────────────┼──────────────────────┘
              │
          ┌───────────────────┐
          │    Web Server     │
          │                   │
          │ • HTTP Endpoint   │
          │ • JSON Parsing    │
          │ • Error Handling  │
          │ • Response Gen.   │
          └───────────────────┘
esp32-cam-ai/
├── src/
│   └── main.cpp              # Main application code
├── include/
│   └── camera_config.h       # Camera configurations
├── lib/
│   └── mcp/                  # MCP protocol implementation
│       ├── mcp.h
│       └── mcp.cpp
├── .vscode/
│   └── mcp.json             # MCP client configuration
└── platformio.ini           # Build configuration
// Check camera initialization in serial output
Camera init failed with error 0x[code]
Solutions:
// Check WiFi credentials and network
Failed to connect to WiFi. Error code: [code]
Solutions:
.env file.env file exists in project root directory.env file format is correct (no spaces around =)WIFI_SSID is not defined. Please define it in your environment variables or in the code. WIFI_PASSWORD is not defined. Please define it in your environment variables or in the code.
Solutions:
.env file in the project root directory.env file in the correct format:WIFI_SSID=YourNetworkName WIFI_PASSWORD=YourPassword
= sign// Monitor heap usage Free Heap: [bytes] bytes
Solutions:
Monitor the serial output for diagnostic information:
CPU Freq: 240 MHz
Free heap: 189092 bytes
WiFi got IP address: 192.168.1.132
Camera initialized: Yes
Modify camera_config.h for specific requirements:
// High quality settings (may exceed 4KB limit)
.frame_size = FRAMESIZE_SVGA,  // 800x600
.jpeg_quality = 8,             // Higher quality

// Optimized for 4KB limit
.frame_size = FRAMESIZE_QVGA,  // 320x240
.jpeg_quality = 25,            // Lower quality, smaller files
Extend the MCP server with additional tools:
handle_tools_list()handle_tools_call()import requests import base64 import json def capture_image(esp32_ip, use_flash=False): url = f"http://{esp32_ip}/" payload = { "jsonrpc": "2.0", "id": 1, "method": "tools/call", "params": { "name": "capture", "arguments": {"flash": "on" if use_flash else "off"} } } response = requests.post(url, json=payload) data = response.json() if "result" in data: # Extract base64 image (under 4KB) image_data = data["result"]["content"][1]["data"] image_bytes = base64.b64decode(image_data) with open("captured_image.jpg", "wb") as f: f.write(image_bytes) print("Image saved as captured_image.jpg") else: print(f"Error: {data.get('error', {}).get('message', 'Unknown error')}") # Usage capture_image("192.168.1.132", use_flash=True)
const axios = require('axios');
const fs = require('fs');

async function captureImage(esp32IP, useFlash = false) {
    const payload = {
        jsonrpc: "2.0",
        id: 1,
        method: "tools/call",
        params: {
            name: "capture",
            arguments: { flash: useFlash ? "on" : "off" }
        }
    };

    try {
        const response = await axios.post(`http://${esp32IP}/`, payload);
        const imageData = response.data.result.content[1].data;
        const imageBuffer = Buffer.from(imageData, 'base64');

        fs.writeFileSync('captured_image.jpg', imageBuffer);
        console.log('Image saved as captured_image.jpg');
    } catch (error) {
        console.error('Error capturing image:', error.message);
    }
}

// Usage
captureImage('192.168.1.132', true);
git checkout -b feature/new-toolgit commit -am 'Add new MCP tool'git push origin feature/new-toolThis project is licensed under the MIT License - see the LICENSE file for details.